Become a Site Supporter and Never see Ads again!

Author Topic: Finished Project: Building My Monaural Playback System  (Read 17972 times)

0 Members and 1 Guest are viewing this topic.

mfrench

  • Guest
  • Trade Count: (0)
Re: Building My Monaural Playback System
« Reply #30 on: September 23, 2010, 01:29:35 PM »
It looks like a fairly standard amp that you have there.  What is the tube lineup?  You'll know more once you have that information.

Typically you'll have a power transformer that supplies the audio circuit and bias ciruit through pre-amp tubes then power tubes and finally through an output transformer.


thanks!
I've taken pictures of the tubes, and i'll gather the images. I took pics of the tubes in their mounts and then out, looking at the pins.
I've stored the amp in the garage for now. I might get brave at some point and start replacing some of the caps; nothing to be done without supervision though. A friend of mine is about as deeply knowledgeable in tube gear design and repairs. Hes worked for years in the radio biz, as an electrical engn'r, supporting old gear. He's suggested helping me sort it out. Its a fairly low priority for now though.

On the renovation front,....
I'm torn between stained glass and perforated metal. I've found some really nice aluminum patterned screening that is totally appropriate, and I have a nice piece of tortoiseshell stained glass. So still debating here.
I took the speaker out yesterday, and reversed its mounting on the main baffle. It was mounted deeply into the cabinet, on the back of the baffle. So I switched the piece of ply that its mounted to, to the outside of the main mounting board, closer to the outside of the cabinet. I also lined the side walls with "egg-carton" foam, and took a 1" thick kneeling pad, and have created a quasi-horn configuration that curves the inside of the cabinet, reducing parallel surfaces area. So the side walls are baffled  with the foam, and the sound is being curved downward through the cabinet floor vent.
While the speaker was out, I put a coat of Franklins TightBond II wood glue over the cone (not the surround). The cone had a slight tear in it. So I paper mache'd a cigarette paper over the tear, and then coated the rest of the cone with the wood glue. This was at the advice of some very knowledgeable old school monophiles, (tweaking tricks from their prime tweaking days).
Overall, solid improvements. Far less woofiness in the bass. Definitely a more refined and focused sound.

Offline Gutbucket

  • record > listen > revise technique
  • Trade Count: (16)
  • Needs to get out more...
  • *****
  • Posts: 15724
  • Gender: Male
  • "Better to love music than respect it" ~Stravinsky
Re: Building My Monaural Playback System
« Reply #31 on: September 23, 2010, 02:32:25 PM »
Looking forward to some pics once you figure out which way to go for the amp surround.
musical volition > vibrations > voltages > numeric values > voltages > vibrations> virtual teleportation time-machine experience
Better recording made easy - >>Improved PAS table<< | Made excellent- >>click here to download the Oddball Microphone Technique illustrated PDF booklet<< (note: This is a 1st draft, now several years old and in need of revision!  Stay tuned)

mfrench

  • Guest
  • Trade Count: (0)
Re: Building My Monaural Playback System
« Reply #32 on: September 29, 2010, 08:53:42 PM »
Well, she has a name - Audrey.
Her namesake is the flower from Little Shop of Horrors.

She got a face lift.

The new outer facade and amplifier surround are finished, w/ exception to some details that I want to rework..
Added: A perforated aluminum grid that is painted to hammered copper (perforated copper = Unobtanium).
The amp is supported on a shelf from inside. There is also a clear acrylic panel surround to support the grid work from behind, and allow for the trim to be screwed to the facade. So, to remove the new facade and replace it with the old is as easy as a few screws, and its back to original.
The grid is screwed to the back of the art-deco accent trim in about 40 places, and tightly around the perimeter as well, for about 60 attachment points. It does not rattle, even turned up louder than comfortable listening.
I like it. It plays with your minds eye, and morphs into a variety of patternings.

Lucille is lending her suspension on the top of the cabinet while we do seismic testing and resonant feedback isolation:


closer detail:


 ^^, I centered the surround facade in such a way as to have it as well framed as the space allowed.
The amp surround and speaker grill are of the same perforation pattern material.

Natural afternoon light, no flash:


Inside the box - new amp shelf, and behind of facade:

I also added a new dedicated knurled earth phono screw, ^^.

The speaker cabinet:


I took the baffle out, and have reversed the speaker mounting to the opposite side of the baffle - it was mounted on the viewed side previously.
This put the speaker closer to the opening.
I also added new foam insulation tape around the entire baffle to seal it front-to-rear.
I've added some rippled foam to the sides to break up parallel surfaces.

Now for something completely different,.....
I've been farting around with making this a quasi-horn cabinet. To that end, I've taken a large mechanics foam kneeling pad (like 24"x36", guessing), and I've stuffed it into the cabinet to create a snail shape that reduces the cabinet size by at least a third, and assists the sound down through the floor vent.
For some reason the photo is really distorted making things look really out of whack, and out of shape. its not,... all the other pictures were at the same time, and its truly squared up, except the picture distortion:
Quasi-horn, in early testing development:


« Last Edit: September 29, 2010, 08:55:22 PM by m0k3 »

Offline Gutbucket

  • record > listen > revise technique
  • Trade Count: (16)
  • Needs to get out more...
  • *****
  • Posts: 15724
  • Gender: Male
  • "Better to love music than respect it" ~Stravinsky
Re: Building My Monaural Playback System
« Reply #33 on: September 29, 2010, 09:41:36 PM »
Gorgeous!  Looks totally correct, like it came that way, with that amp as an upgraded option, back in the day.

Very nice work, Mike.  Just be sure to keep Audrey well fed with a steady diet of shellac, acetate, and vinyl.
musical volition > vibrations > voltages > numeric values > voltages > vibrations> virtual teleportation time-machine experience
Better recording made easy - >>Improved PAS table<< | Made excellent- >>click here to download the Oddball Microphone Technique illustrated PDF booklet<< (note: This is a 1st draft, now several years old and in need of revision!  Stay tuned)

mfrench

  • Guest
  • Trade Count: (0)
Re: Building My Monaural Playback System
« Reply #34 on: September 29, 2010, 10:22:02 PM »
thanks, Lee. I appreciates it.

Now I can work on mounting the TT and arm. I'm going to have to create a frame and an isolated subframe for the turntable to float on.
I was thinking of a simple shelf, hanging from the interior cabinet framing, and fortifying it to hold a bit of load. Then create a separate TT plinth that will mount the the shelf main frame with a series if superballs between the layers, perhaps some other form rubber or of air balls as the shelf/subframe interface,... maybe springs, but thats a bit more complicated.
At any rate,.... now to the TT mounting. I'm probably going to go with stacked layers of plywood, minimal cutouts, with a copper plate top deck. The TT is hammered copper, the facade is hammered copper,.. so a copper top deck would probably be appropriate.

Presently Spinning: Hoagie Carmichael recordings from the late 20's.
Georgia on my mind.

Django Reinhardt 78 cued,....

Offline it-goes-to-eleven

  • Trade Count: (58)
  • Needs to get out more...
  • *****
  • Posts: 6696
Re: Building My Monaural Playback System
« Reply #35 on: September 30, 2010, 01:57:19 AM »
Totally "m0k3nural"!

mfrench

  • Guest
  • Trade Count: (0)
Re: Building My Monaural Playback System
« Reply #36 on: September 30, 2010, 10:40:59 AM »
m0k3natural   (<- think plenty of fats, byproducts, and synthetics)

Its funny,.. I've posted it here, and in two other forums (LencoHeaven, and, audiokarma).  The reactions have been mostly supportive, except at audiokarma. Its been mostly supportive over there, but, there have also been some strongly voiced opinions that I'm changing the time/space continuum by doing this; tragic. They don't seem to understand that the only changes are easily reverted to original, with a few screws.
The way that I see it:
The youngest component that I'm installing is still two years older than I am. That keeps it in the antique category, and keeps me just one or two steps ahead of that category myself.

Offline it-goes-to-eleven

  • Trade Count: (58)
  • Needs to get out more...
  • *****
  • Posts: 6696
Re: Building My Monaural Playback System
« Reply #37 on: September 30, 2010, 02:19:20 PM »
It's a tough call.  So many old console systems get junked because people don't have the room, they don't work, the fire hazard, they get electric shocks from the gear (seriously!), they don't play those records, etc...    You're keeping the old parts, so I don't see an issue..

I do wonder about record wear with the old gear.  You see those massive tonearms, etc, and can't help but wonder if it is in any way too wearing on the records.    Those old cats who engineered that stuff knew a thing or two about mechanical design, so I'm not sure that is an issue.  It may depend on the old gear being in perfect mechanical condition, and I'm sure it varies with the design...

It might be interesting to have an a/b recording of the original configuration's sound vs. the new config.

mfrench

  • Guest
  • Trade Count: (0)
Re: Building My Monaural Playback System
« Reply #38 on: September 30, 2010, 02:35:29 PM »
I'm going to run a GE VR_II triple play cartridge. Its spec'd at 4grams tracking load. There are quite a few newer carts that fall within that range as well; stanton comes first to mind, ranging from 2.5->5grams (winging it here, but reasonably close to specs). So the vinyl won't get too abused.
The GE arm is rigid and unflexible (vertically) all the way out to the headshell. Its only the headshell weight that add's effective mass to the equation, and the headshell has an adjsutablecounter-weight that ranges from 2grams -> 15grams or so.
In speaking to a couple of old radio DJ's from the era,... they ran 8gram needles in microgrooves for years,without undue wear. To paraphrase them - the smoke, dirt, and grit did more damage than the tracking force.
Some of that old vinyl was really heavy, and by feel, substantially harder than the oil crisis post-releases, which is where substantial changes came in tracking force loads.

I'm still toying around with some ideas. I like the idea of the GE arm, and the cartridge that it was designed for (or vice versa). I'm also thinking about a cherry wood tonearm from www.tonearmaudio.com, but have a request to see if he'll still build them old style without the plastic cart. swap system. The tonearmaudio arms are a shoe-in for their appearance.

mfrench

  • Guest
  • Trade Count: (0)
Re: Building My Monaural Playback System
« Reply #39 on: October 08, 2010, 10:55:15 PM »
the plinth'ing begins,....

I'm going to use five stacked layers of .70" / 18mm  HomeDespot birch ply, as a suspended plinth, plus, a base shelf layer that is attached to the cabinet. I've yet to find a single void after making tons of cuts - fine wood. This is my second plinth out of it now.
I'm going to build in a suspension system, utilizing 1.5" Mighty Morpin Power Rangers Super-Balls from BigLots that cost a whopping $2 for two two-packs.

let the cipherin' begin;
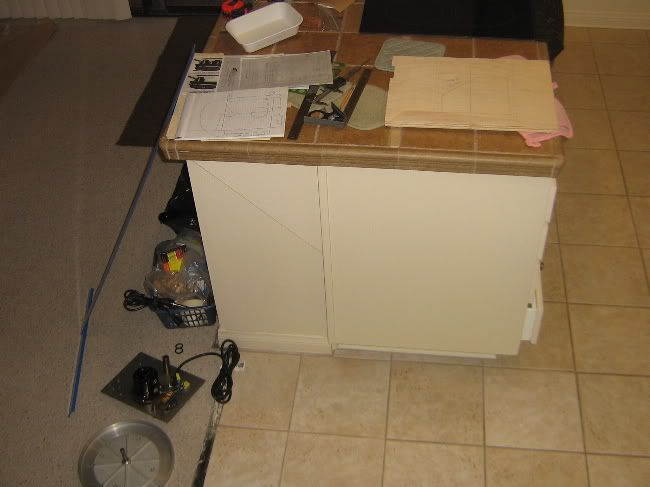

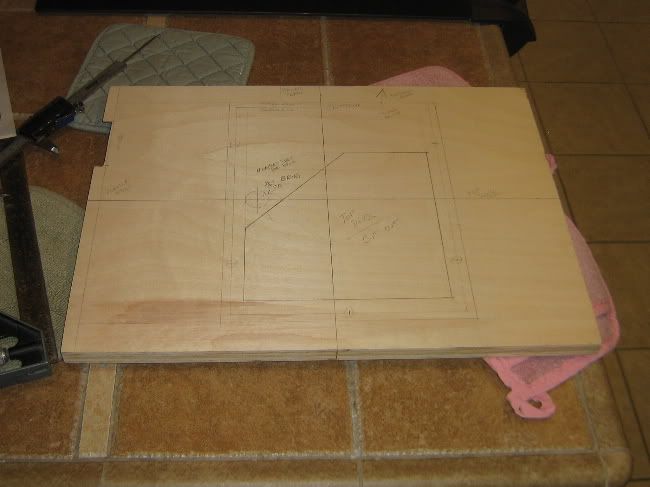
the end of the kitchen peninsula counter is where I do my thinking and drawing:
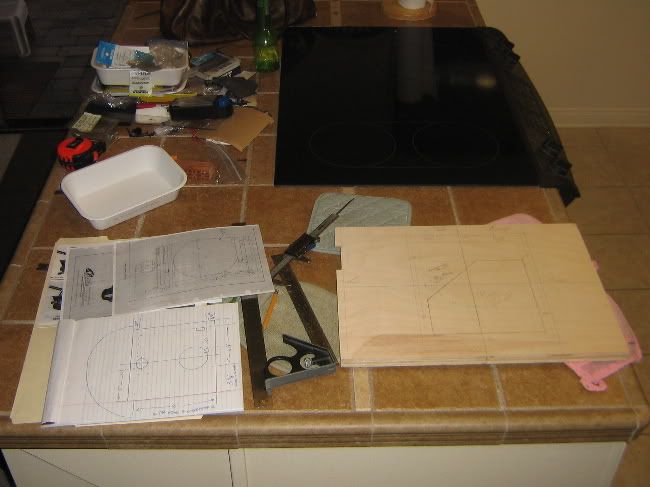


cut-out top deck layer (layer 5):
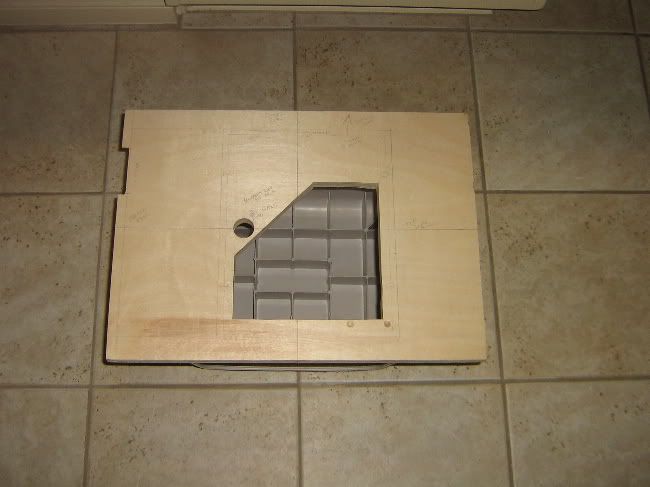


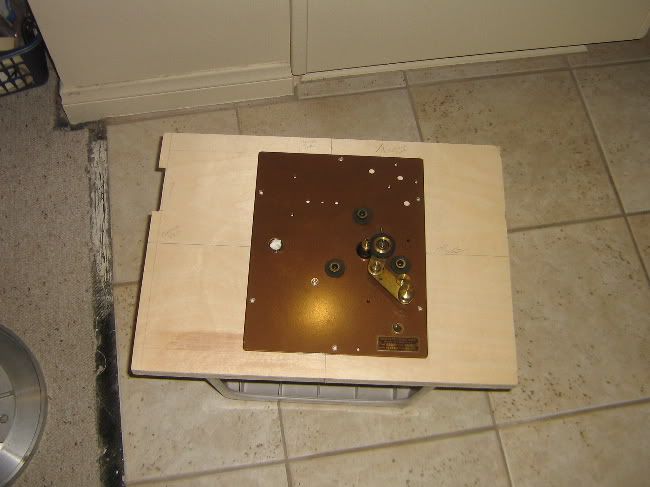
On the inverted stool plinth:
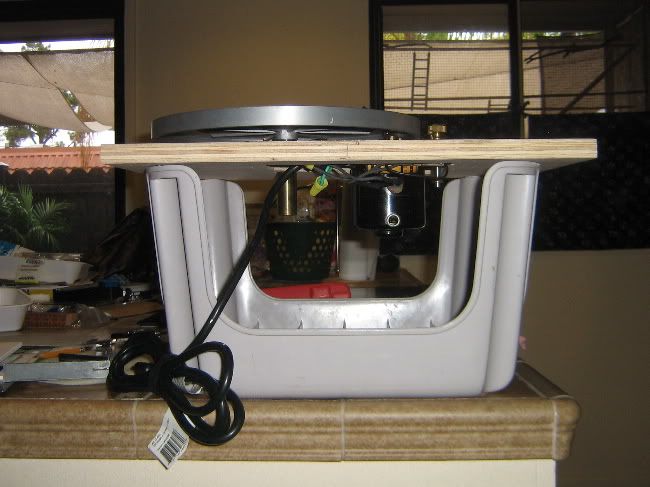

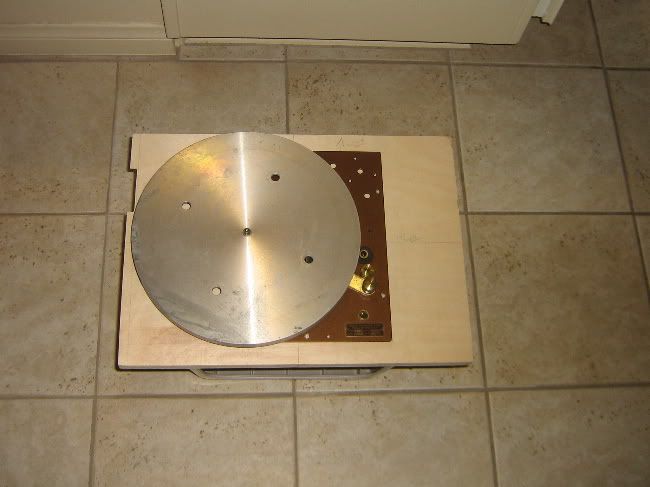
the underpinnings:

in the cabinet, with the rest of the layers cut to match:
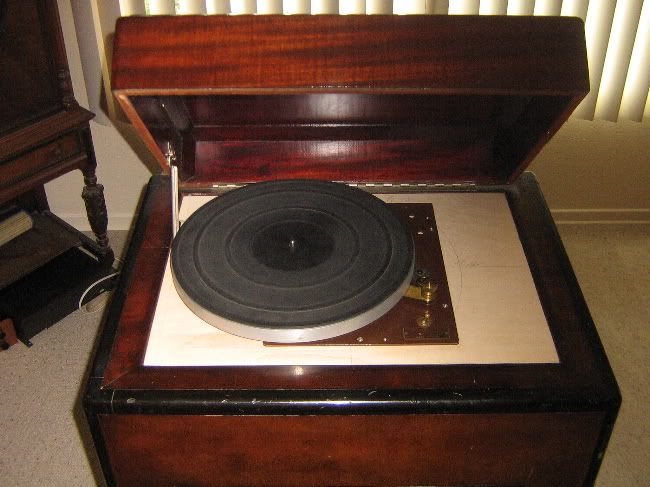

I'm going to use a metal sheet over the wood, of either real copper, or, hammered copper painted on aluminum. The wood top deck will be painted black, lacquer black gloss, to match the trim, with the metal top deck mounted over it.
The arm wants to fit half on the original top plate, and half off of it. So I'm going to have to rig an arm board extension to the side of the top plate to carry half the tonearm base, and level it.

Next up,... the backside development, and the Mighty Morphin power Range Superball suspension! I know y'all are dying to see this one ::laughs maniacally::

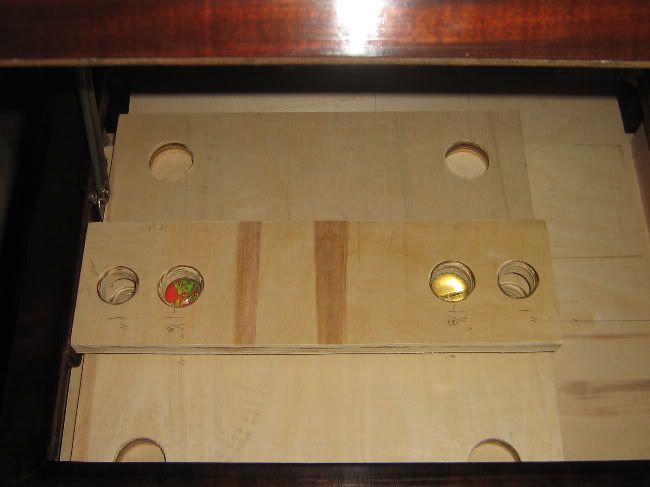
plinth suspension test boards, with the mighty morphin power rangers:
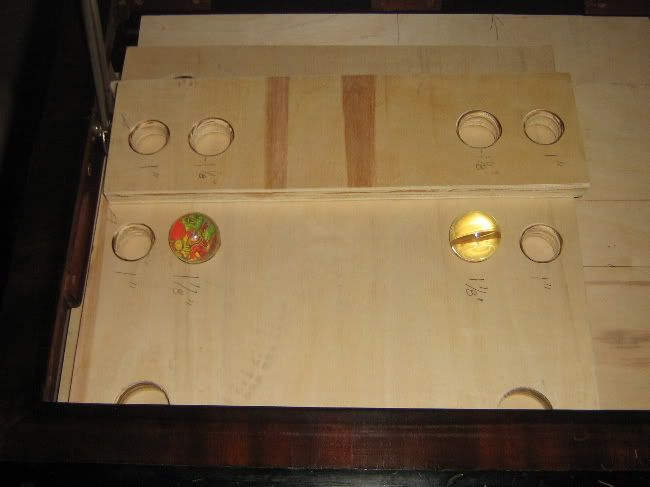


The two boards, ^^, represent the base shelf layer that is attached to the cabinet and, the turntable plinth, which is supposed to be suspended and isolated from the cabinet.
I found that the Lenco spring suspension plinth eliminated resonant cabinet feedback, so I decided to incorporate a suspension system within this plinth build.
My wife found some superballs at a clearance store chain that were an inch and a half in diameter.
The boards were utilizing various levels of contact and containing of the balls. I finally settled on a clear pass-thru hole for the bottom of the suspension layer, and a capturing smaller diameter at the upper layer.
The bottom layer depends on the ball riding on the tangential apex contact of the curve of ball and supporting surface on the bottom, and, the plywood rim around its center diameter (1.40" ball diameter and 1.5" hole saw cutout in .70" plywood).  The top layer solidly captures the ball around a ring about 3/4 high on the ball (a 1" hole, with rounded over edge).

Here is the stack of layers of plinth plywood leaves on the base, testing the suspension - trying for overload:
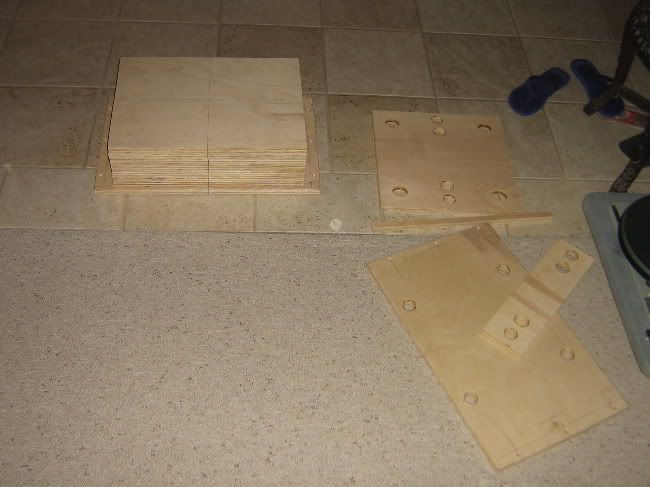


Here is a view of the plinth in early fitting stages, with the superballs in place:
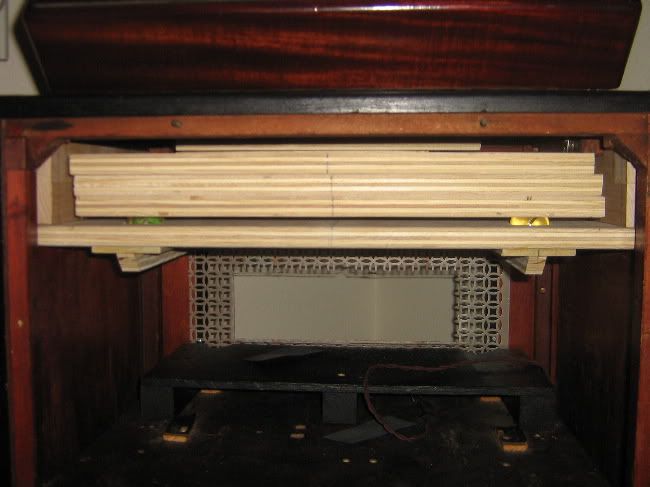

The staggered offset of the ply layers centerline, above ^^, is due to the lid prop cut-outs not being done yet. I took the picture before I'd cut them out. So there is the staggered offset present; which has since been corrected.

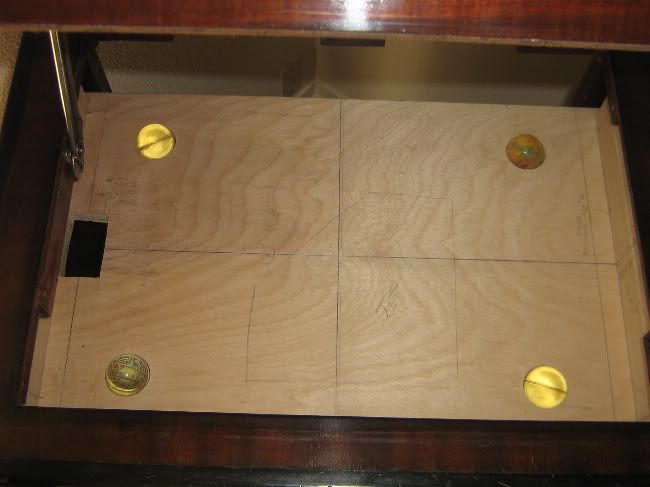
Base layer with suspension bearing balls:

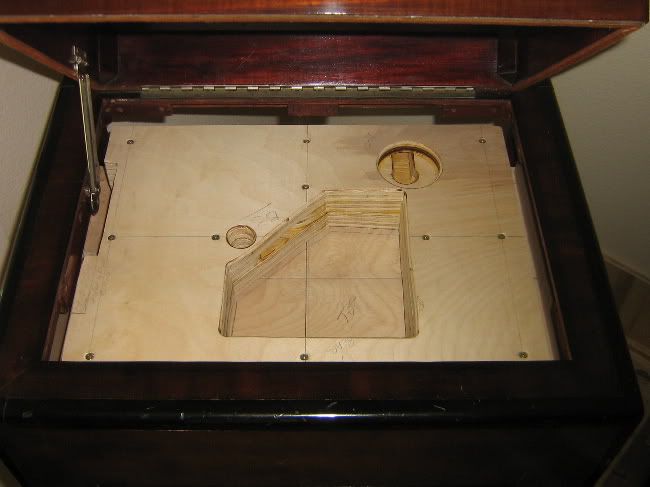
layer 3 - now laminated to b1 and b2, with tonearm cutout base structure. THe keyhole at the bottom is to pass a cable through to the tonearm base mounting plate:

plinth painted flat black.
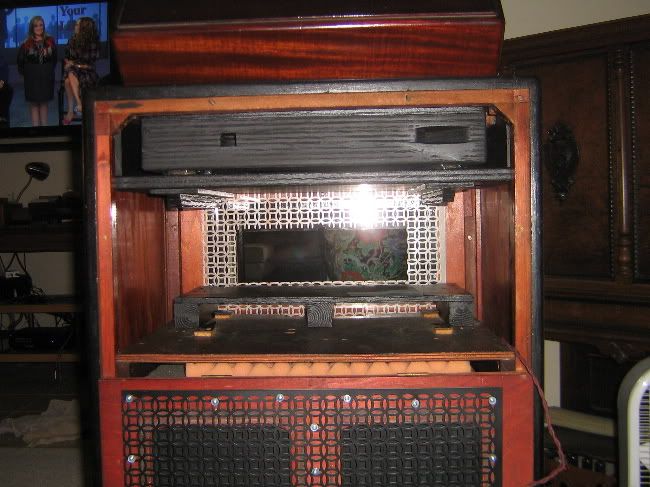

The base layer and b1,2,3 are separate from the 4th and 5th top layers. They are all screwed together into a monolith, but need to be separate for assembling.
There are five total layers of minimal cut-away layers as a base.

Now with the addition of a solid copper top plate that the TT mounts to:
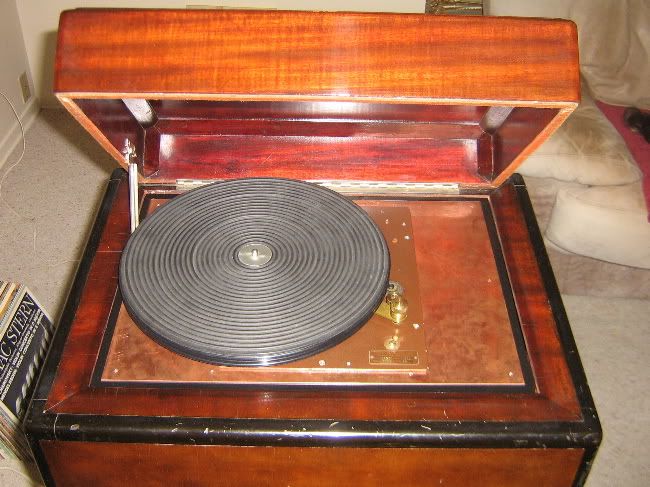

Up next,... the tonearm mounting.
I've got to level the arm area, as the arm wants to hang off of the original top plate. The OR top plate is 1/8" thick, which is easy enough to match. Then I want to add another thin layer to cover the OE top plate holes and bridge over onto the additional extension of the top plate (the 1/8" elevation offset addition).


Offline it-goes-to-eleven

  • Trade Count: (58)
  • Needs to get out more...
  • *****
  • Posts: 6696
Re: Building My Monaural Playback System
« Reply #40 on: October 09, 2010, 02:29:11 PM »
Nice!  It looks like a verry satisfying project...

mfrench

  • Guest
  • Trade Count: (0)
Re: Building My Monaural Playback System
« Reply #41 on: October 09, 2010, 10:55:12 PM »
Its a challenge. Yeah, I love that feeling, especially when its ready for its first spin.

Ok,.... I spent the afternoon whitllin' some copper and aluminum.
The tonearm is essentially fitted. I had to "shim it" to matching height with 1/8" alum. to match the thickness of the original (oe) top plate.
Because the arm base is round, the extension looked best as being round (to my eye). So I gave it a radius, and curved it back into the original plate.
I used the cut-away piece of copper from the motor cut-out, and refitted it to the purpose of covering a bunch of already present drill holes, and as the extension for the tonearm base. So, its shape is somewhat dictated by the shape of the scrap piece, which just happened to lend itself well to the task.
At present, its just placed, and not fastened into place; I'm still dry fitting. I'm going to use two existing holes in the top oe plate. The tonearm is also footed through one of the existing holes in the oe plate.

Next up,... the final tighten up!


mfrench

  • Guest
  • Trade Count: (0)
Re: Finished Project: Building My Monaural Playback System
« Reply #42 on: October 12, 2010, 04:40:49 PM »
Here is Audrey, finished, and spinning her first tunes - Guy Lombardo mono 33.3:


OK,... its finished, completely. I soldered up the tonearm output connectors, and,... nothing; WTF??
I loked more closely at the soldering and the tiniest speck had come off and attached itself to the rca connector, soldering together the + and - leads, which cancelled each other out, to produce nothing.
So, a utility knife to pop that little discrepancy, and we're making really cool tunes!
So, Audrey is now a finished a reality. The suberballs allowed for cranking it to 11, without any resonant feedback; so the isolation theory worked. 
The arm is really cool!
Sarge even commented on it. She'd strongly suggested thinking it was this clunky thing, until she tried it.

Offline Gutbucket

  • record > listen > revise technique
  • Trade Count: (16)
  • Needs to get out more...
  • *****
  • Posts: 15724
  • Gender: Male
  • "Better to love music than respect it" ~Stravinsky
Re: Finished Project: Building My Monaural Playback System
« Reply #43 on: October 13, 2010, 10:31:41 AM »
Really looks great.

Spin the Django record again.
musical volition > vibrations > voltages > numeric values > voltages > vibrations> virtual teleportation time-machine experience
Better recording made easy - >>Improved PAS table<< | Made excellent- >>click here to download the Oddball Microphone Technique illustrated PDF booklet<< (note: This is a 1st draft, now several years old and in need of revision!  Stay tuned)

mfrench

  • Guest
  • Trade Count: (0)
Re: Finished Project: Building My Monaural Playback System
« Reply #44 on: October 21, 2010, 09:31:44 PM »
OK,.... I'm thinking about improving the speaker in this thing. Its 6", and small for the cabinet; Sarge agrees.
I'm looking at 8" speakers because the original plywood mounting panel had a cut-out for an 8" speaker; the 6" is mounted to a secondary mounting panel that screws to the main mount panel.
I'm debating on either a coaxial speaker, or, possibly a full range single cone (a Betsy by www.wildburroaudio.com)

I'm also debating a 10" speaker, because it can be shoehorned in.  The mount panel for the speaker can handle the larger diameter speaker, but, the opening on the cabinet face would obscure the surround of the speaker, but not the cone.
Given the coaxial speaker, I'm not so worried about obscuring the surround of the "woofer" full range speaker; so I think it might work.

I guess my question is,...
Is thinking about a 10" speaker being greedy here? Overkill??
Or would I be better served staying with an 8" speaker?

The inside of the cabinet measures roughly 18"x18"x18" within the speaker portion of the cabinet, though, the entire interior of the cabinet is open and non-baffled, with exception to the TT shelf and the amp shelf, neither of which are sealed compartments.
To go 10", I'd need to create a new mounting panel - not really a problem.
To go 8" is far closer to a straight bolt-in exchange.
« Last Edit: October 21, 2010, 09:34:06 PM by m0k3 »


RSS | Mobile
Page created in 0.234 seconds with 40 queries.
© 2002-2024 Taperssection.com
Powered by SMF