Become a Site Supporter and Never see Ads again!

Author Topic: Zoom F8 Review  (Read 44359 times)

0 Members and 1 Guest are viewing this topic.

stevetoney

  • Guest
  • Trade Count: (0)
Zoom F8 Review
« on: November 01, 2015, 08:18:54 PM »
ZOOM F8 REVIEW

Welcome to my review of the Zoom F8 multi-track field recorder!

My goal in this review is to give people a fairly thorough understanding of this recorder and its functions, so that you can know what you’re buying before taking the leap.  I am a hobbyist field audio recordist, also known as a taper.  Though I’m quite active, I don’t use my equipment professionally and I’m not familiar with the needs of the film and recording industry.  So keep that in mind as you go through this review since, for example, timecode and/or detailed mixing functions aren’t necessarily features tapers use in the field. 

As of the writing of this review, I’ve owned the F8 for about two months and have recorded two music festivals (both were three day festivals in which I recorded all day long) and been out to clubs about five other times with it.  I’m not sure that I’ve mastered its functions, but feel I’ve used it enough to provide a fairly comprehensive overview.     

This review is broken down into sections, as listed below:

1.  General Overview
2.  Preamps
3.  Media and Storage
4.  Powering
5.  Menu Details
6.  Wireless - Bluetooth
7.  Using the Mixer
8.  Timecode
9.  Miscellaneous Items
10.  Specifications
11.  Suggestions and Issues

In general, I’ve attempted to stick with the facts, though reviews aren’t truly useful unless there’s some general impressions are provided.  I’ve provided those, but attempted to keep personal bias to a minimum. 

I sincerely hope everyone that reads it finds this review helpful.
« Last Edit: November 07, 2015, 04:04:31 PM by tonedeaf »

stevetoney

  • Guest
  • Trade Count: (0)
Re: Review - Zoom F8
« Reply #1 on: November 01, 2015, 08:21:47 PM »
1.0   GENERAL OVERVIEW

My general impression of the Zoom F8 can be summed up quite simply…hands down the best ‘bang for buck’ audio device I’ve ever purchased.  I’m not a pro, so I may not be qualified to provide a subjective characterization of whether this is pro or consumer grade gear, but my general impression is that it’s much closer to pro gear than consumer.  The feature set packed into the Zoom F8, which is reviewed generally in this review, at the existing price point are impressive.  On to the details…


UNBOXING

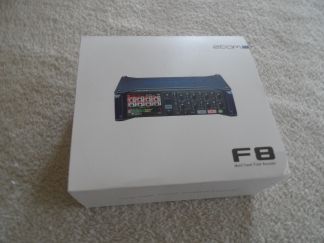
My Zoom F8 arrived in a nicely packaged box. 


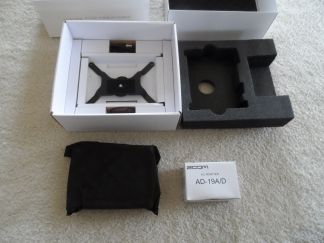
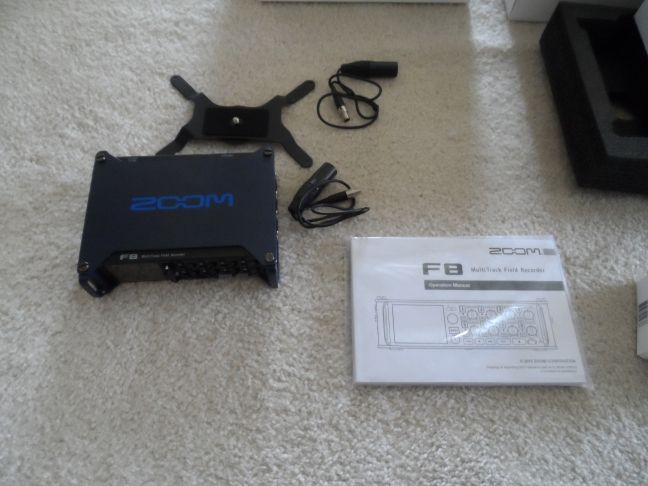
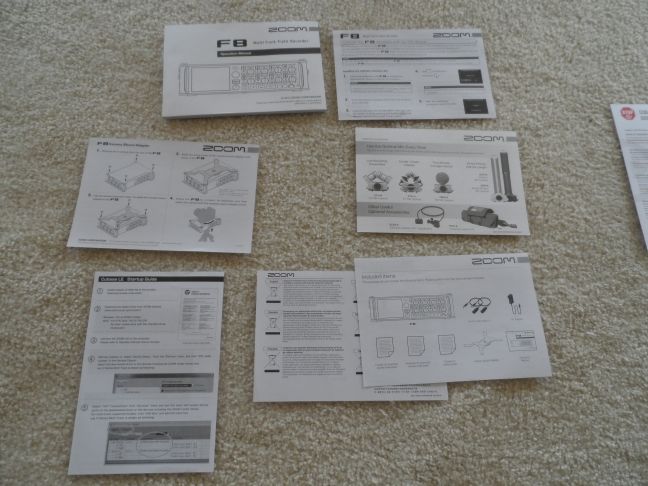
The box contained the Zoom F8, a camera mounting bracket, two mini-XLR > XLR cables (for main outs), AC power supply (wall wart), the manual, warranty card, miscellaneous paperwork, and free download codes for Wavelab LE and Cubase LE.


SIZE AND CONSTRUCTION

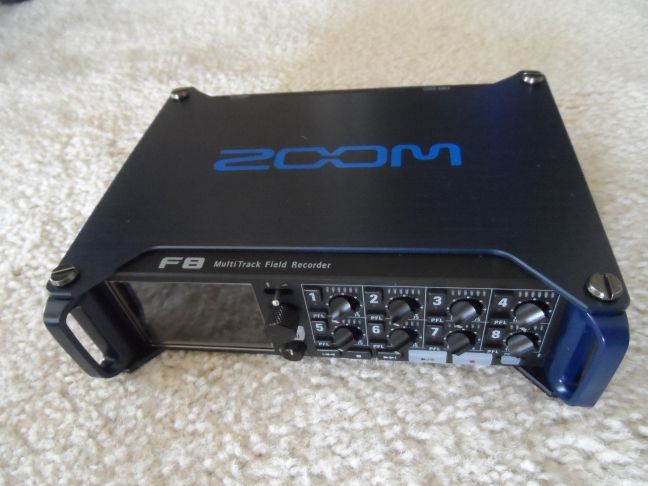
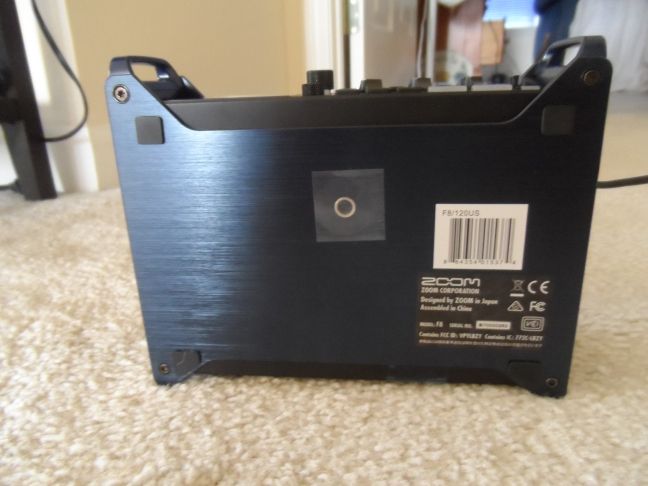
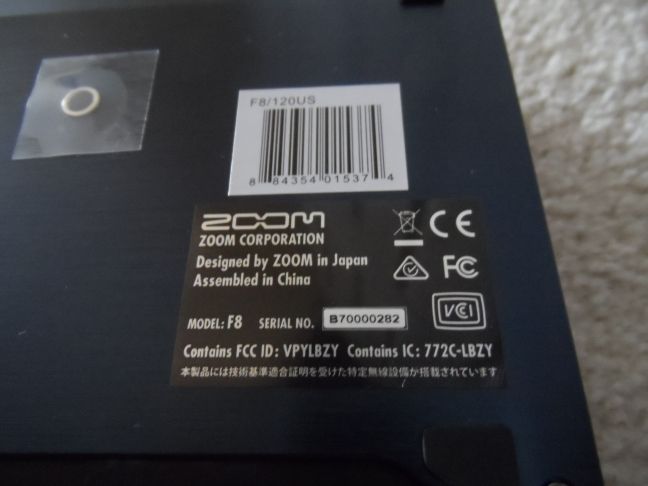
Construction of the F8 is top notch and solid.  The body of the F8 is enclosed by an attractive blue anodized metal on top, bottom and protective rails.  Side and rear connectors are all solid and offer no give or play.  The under body frame appears to be metal and all of the front panel materials seem top notch.  After two months of moderate to heavy use without any plastic protection, the front panel display is completely scratch free.  I’m not sure if this is a good testament to its scratch resistance, but so far so good as it’s been used, not abused, in normal field application over the course of a number of days of fairly rugged use.  I’ll probably apply some protective plastic film soon…better safe than sorry.  Size is similar to the SD7xx line of digital recorders. (Some size comparison data is provided below.)  Since the unit is still new, I can’t say for certain how it will withstand the sands of time, but after six festival days and five nights on the town, it has yet to show even a scratch.  I’m very pleased with the construction at this point and haven’t got anything negative to say.  Note from the last photo that the unit is designed in Japan and assembled in China.  This certainly is a factor in the lower price of the unit compared to some of the competitor products on the market.  The Zoom F8 is definitely not a toy and it has a pro-gear feel.

Zoom F8:  7.0 in (W) × 5.5 in (D) × 2.1 in (H); 2.1 pounds
Sound Devices 744:  8.2 in (W) x 4.9 in (D) x 1.8 in (H); 2.6 pounds
Sound Devices 788: 10.1 in (W) x 6.4 in (D) x 1.8 in (H); 3.7 pounds
Tascam DR680: 7.9 in (W) x 6.9 in (D) x 2.1 in (H); 2.6 pounds


INPUTS AND OUTPUTS

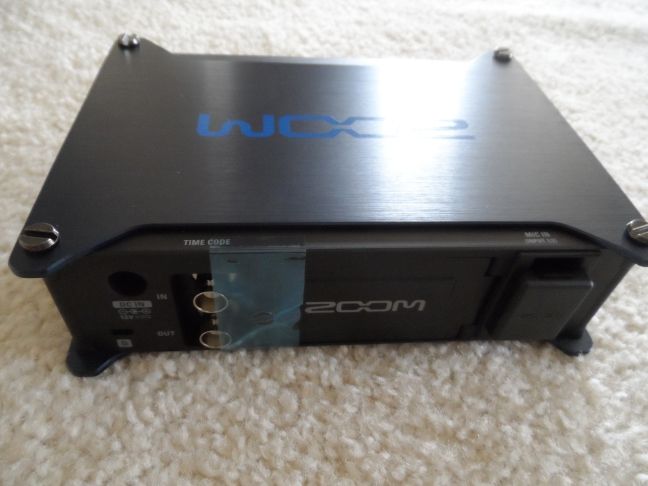
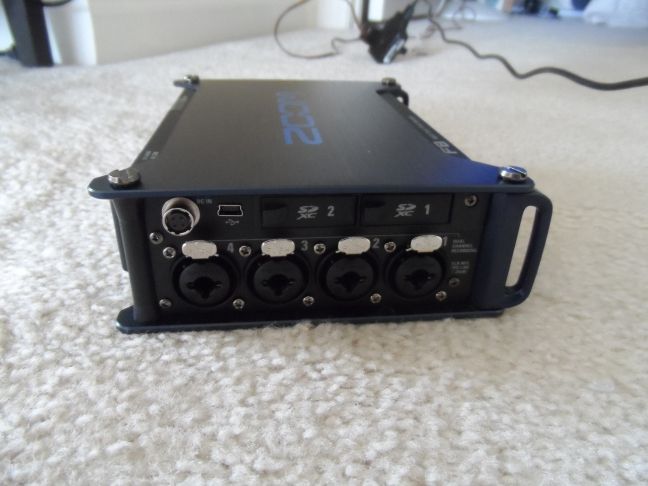
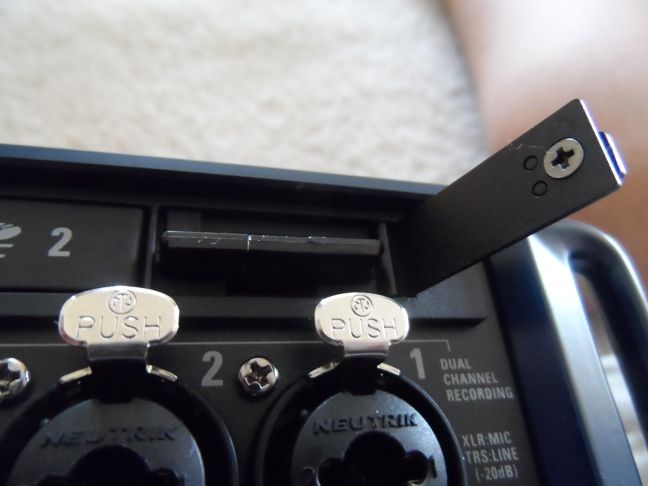
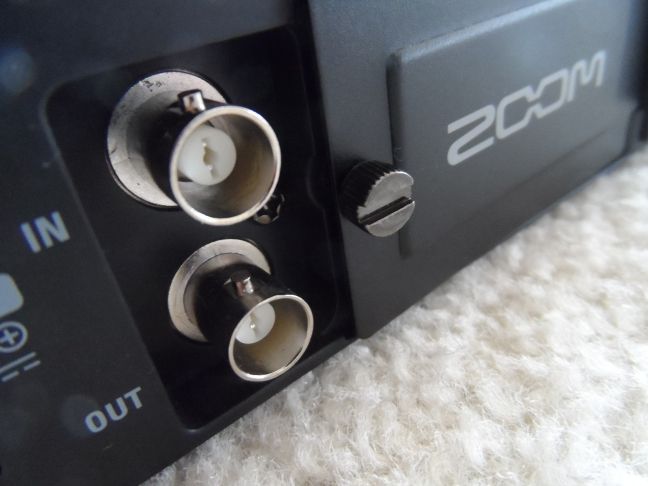
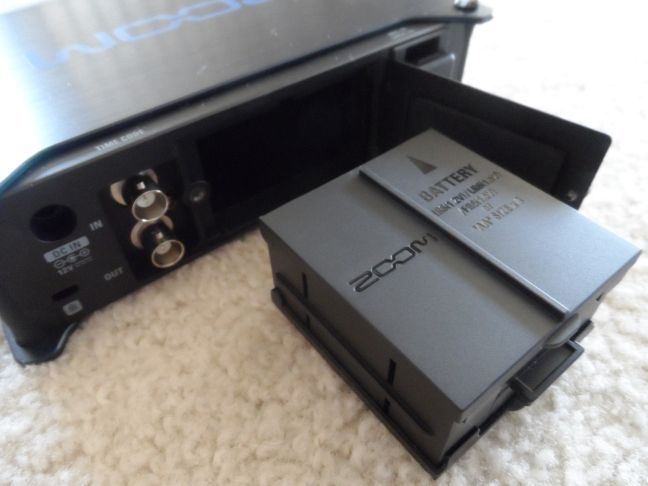
The unit has eight combo XLR/TRS inputs.  There are a pair of special mic inputs on the rear panel for Zoom branded microphones (PIP is menu activated for these two input connectors).  These inputs aren’t seen in the photos but they’re beneath the rectangular plastic protective cover on the rear panel.  There are also two coax connectors on the back panel for timecode in and out.  There are no auxiliary input connectors, such as a 1/8 inch mini input for a separate line-in. 

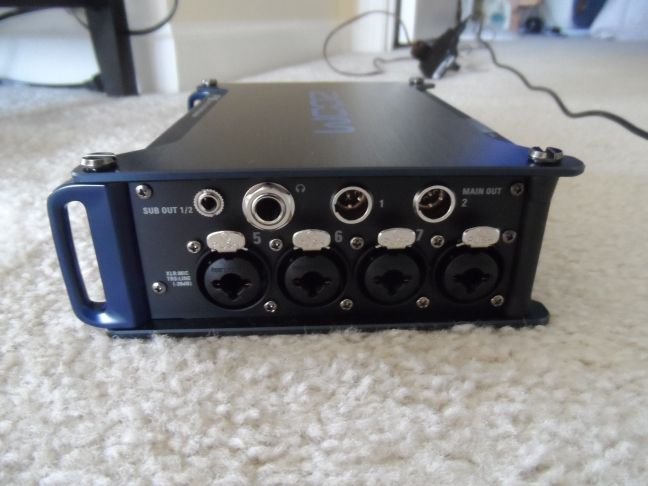
All eight of the inputs are combo jacks allowing for either XLR or ¼ inch TRS inputs; four inputs are located on the left panel and four are on the right panel.  When XLR inputs are used, the connectors act as mic-in connectors.  When the TRS inputs are used, the connectors are line-in connections.  More on this later on.

The unit has three sets of outputs on the right side panel; headphones, mains and subs.  The headphone output is a ¼ inch jack, MAIN is a pair of mini-XLR jacks, and SUB is from a 1/8 inch mini jack.  The outputs can be turned on and off via menu options for power conservation. 


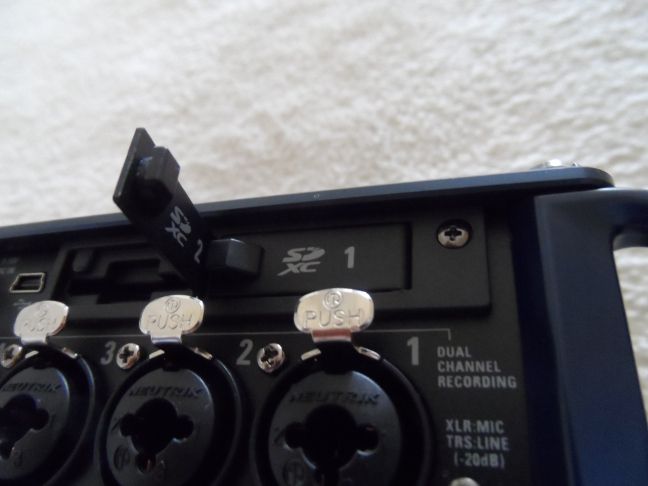
SD CARD AND BATTERY COMPARTMENT COVERS

The SD card covers are magnetic doors, not rubber covers seen in many recent products and are spot on as far as how they function.  They seem sturdy and reliable. 


The battery compartment cover is metal and has a sturdy well-built feel.  There is a thumb screw that securely fastens the door closed when latched with the thumb screw turned in.  The thumb screw turns in and out freely for unlatching the battery door cover. 
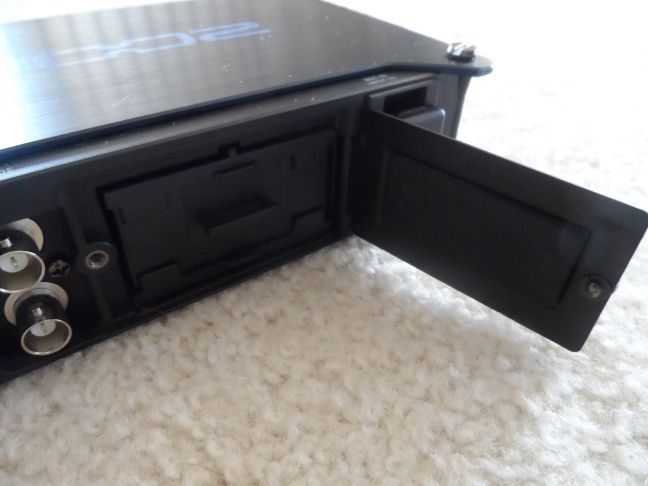
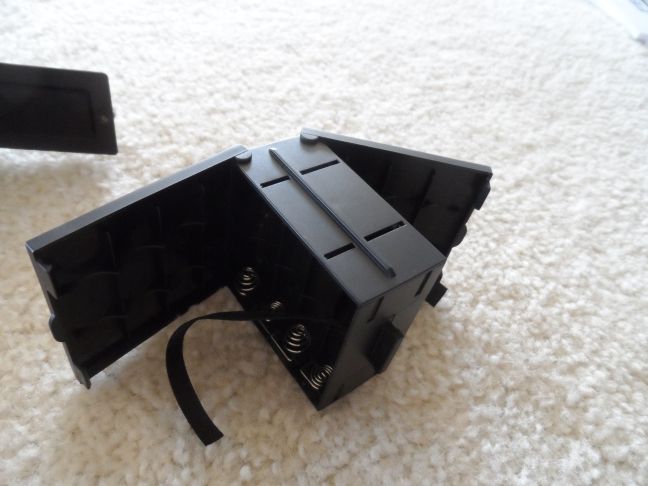


BATTERY TRAY

The plastic battery tray/sled is a special design that appears unique to the Zoom F8.  It is easy to access and slides in and out of the unit effortlessly.  The battery tray/sled holds eight AA batteries, four on the top and four on the bottom.  Each side has a ribbon for inserting beneath the batteries upon insertion…quick pull on the ribbon pops the batteries out for quick removal.  Both sides of the tray/sled have a cover than snaps closed to retain the batteries inside the tray/sled.  This is a nice feature if you’re carrying the sled loose in a pocket or bag as the covers will keep the batteries from falling out on their own.  Hopefully Zoom will make available for purchase spare sleds in case of damage or loss.  It might also be handy to have an extra pack ready for quick change-outs if needed. 


FRONT PANEL CONTROLS

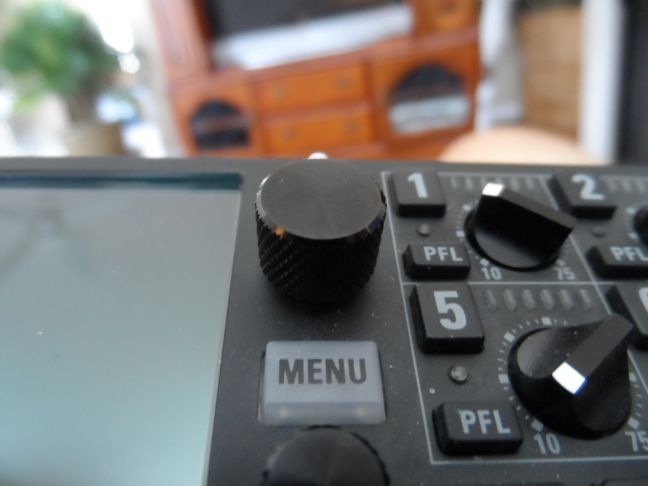
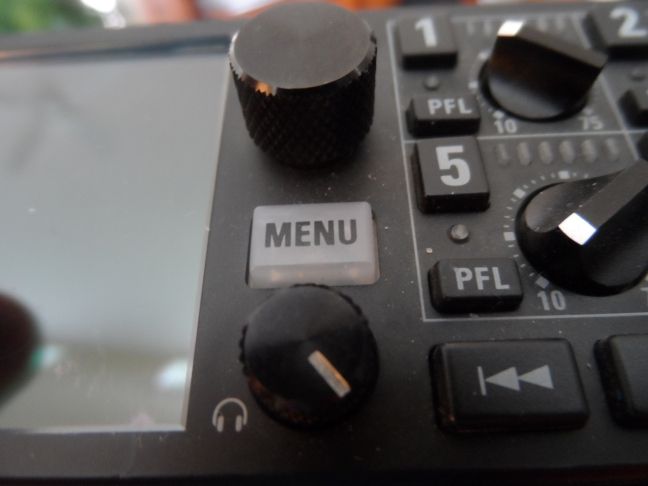
The main toggle knob (which the manual calls the ‘select encoder’) is black knurled metal and with a very solid pro feel.  The knurling on the knob provides a solid grip.  Turning the knob provides a ratcheted detente 'clicky' feel with clicks being succinct and sharp, without being overly clicky feeling (not a very technical description, but hopefully that makes sense).  One click equals one spot movement in the menu up or down.  Push-to-click on the toggle knob to select an item from the menu.  This knob feels professional all the way. 


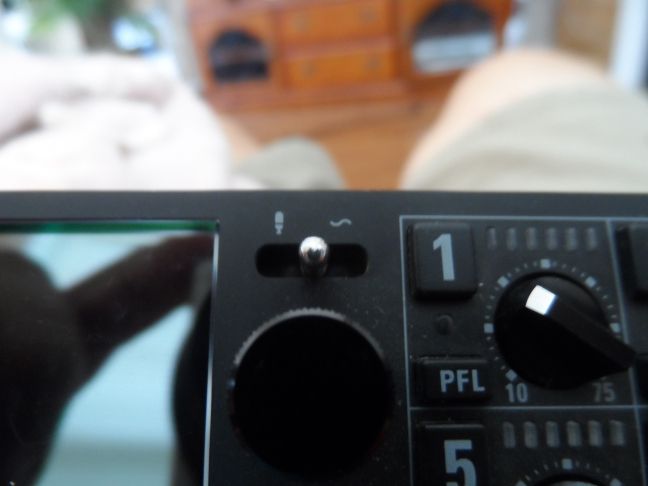
Immediately above the select encoder knob is the slate mic and slate tone switch.  The switch is a three-position switch with a center position default that the user slides left or right to activate the slate mic or slate tone.  Upon release, the switch spring returns to the center position.  The slate mic and slate tone overrides any other inputs being written to the SD cards.

Slide the switch to the left to activate the slate mic.  Releasing immediately after sliding activates the slate mic.  It will stay active until the switch is slid to the left again to turn the slate mic off.  Sliding and holding the switch for two seconds or longer activates the slate mic for only as long as the switch is manually held to the left.  Upon release the slate mic turns off. 

Slide the switch to the right to activate the slate tone.  The slate tone operation is somewhat opposite of the slate mic.  Slide the switch and release immediately to activate the slate tone for only as long as the switch is engaged.  Slide and hold for one second or longer and the slate tone will be enabled until the switch is slid to the right again.


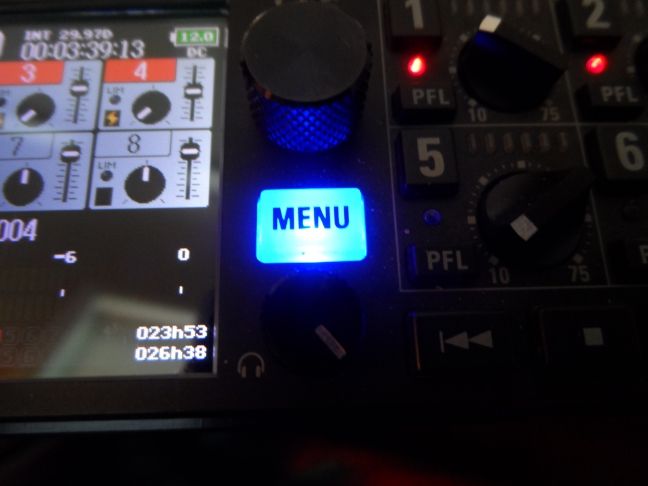
Just below the select encoder knob is the menu button.  Quick pressing the menu button changes the display from one of six monitoring screens (see a little farther below for description) to call up the main menu of controls for the unit.  Long pressing the menu button brings up a confirmation (yes/no) to activate Bluetooth.  When Bluetooth is turned on, the menu backlight turns on and the menu button glows blue.

A headphone level control is located below the menu button.


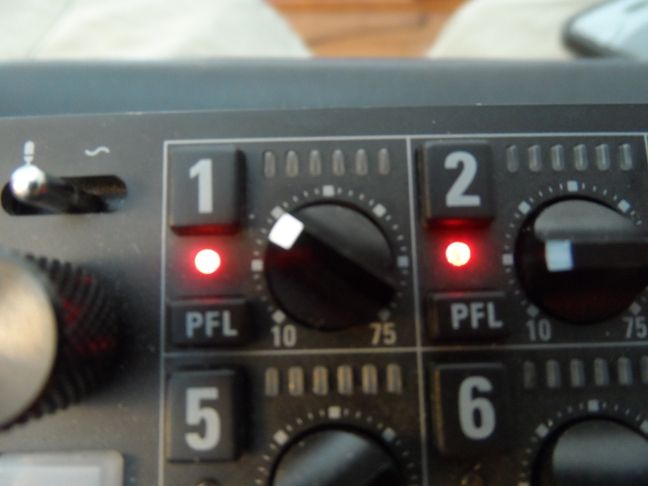
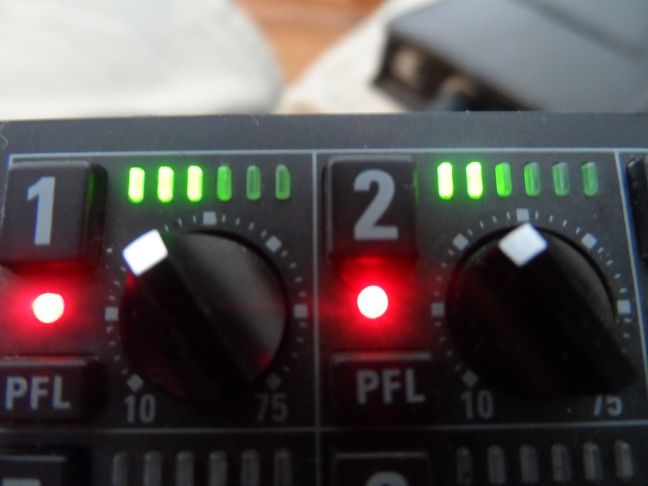
To the right of the select encoder knob are the input controls and lights associated with each of the eight input channels.  Each channel has a channel select button (called a ‘track key’ in the manual), a PFL button, a level control knob, a level LED meter, and a LED light that indicates when the channel is active.  (PFL stands for PreFader Listening.)  Toggling the track key/channel select button on and off arms and disarms that channel for recording.  When the channel is toggled on, the respective channel LED glows red.  If signal is present, it appears on the LED level meters (as well as the main display).  Signal levels are controlled by the level knobs.  The PFL button activates a menu in the display for a variety of input parameters for that specific channel, such as phantom power on/off, phantom voltage, high pass filter, etc.  When the PFL button is toggled on, the channel LED glows orange.


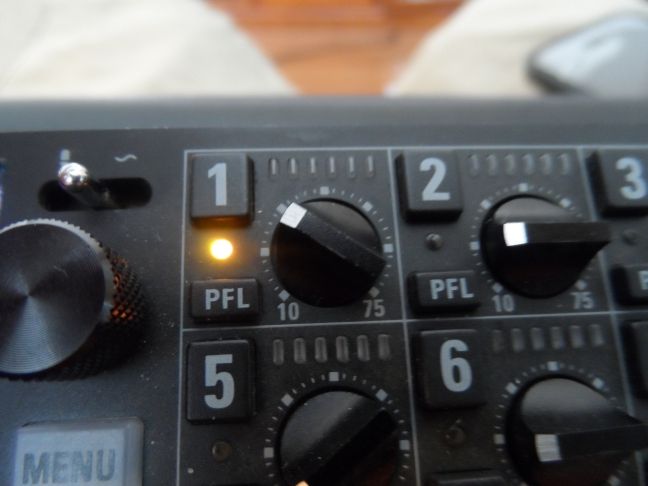
Input control buttons and knobs have a solid feel.  The track key/channel select and PFL buttons have a distinct authoritative click when pushed.  The level control knobs, while small, aren’t too small for my fat fingers.  Rotation of the knobs provides for control of levels with an adequate capability for ‘dialing it in’ when you’re trying to match levels, though the level controls are quite sensitive in terms of rotational movement, as explained further below.

The complete range of the level knobs from full counter clockwise to full clockwise takes the level control through a 65db range.  The range is from +10db to +75db at mic level and -10db to 55db at line level.  With a 65db rotational scale, level control knob movement is quite sensitive, meaning that small changes in the rotational position of the knob results in a reasonable change in level setting.  I’ve found it a little bit difficult to ‘dial in’ when attempting to match levels, at least when compared to other units I’ve used in the past.  With eight knobs on the front panel, the knobs probably couldn’t have been sized larger, but I enjoyed the Sound Devices ability to re-scale the level ranges with menu selectable low and high level scales (selectable and smaller ranges resulted in less sensitivity to small changes in rotational movement of the knobs).  Perhaps that feature wasn’t possible on the Zoom F8 as these level knobs aren’t infinite rotation type.  This isn’t a show stopper by any means and levels can certainly be ‘dialed in’ so that they peak on the same bar (i.e. within 0.5db of each other), but these knobs require a soft touch.  Round knobs might have helped.

A feature of multi-channel recorders that many experienced multi-channel users covet is the ability to optionally gang channels so that once levels are set relative to each other, they can all be changed simultaneously.  The Zoom F8 unfortunately does not have any channel ganging capability.

Since the track key/channel select and PFL buttons are close to the level knobs, there was an initial concern with the possibility of accidental button pushes.  Fortunately, this isn’t much of a concern since the buttons need a bit of a push in order for them to click/engage.   It’s possible, but shouldn’t be much of an issue. 

The transport control buttons along the bottom of the front face (REW, STOP, FF, PLAY/PAUSE, REC, and ON/OFF) are all solid and have the same feel and feedback as buttons on a Sound Devices 7xx.  FF and REW progressively speed up the rate of forward or reverse the longer the buttons remain pressed.  The MENU, PLAY/PAUSE, REC, and ON/OFF buttons are all backlit for recording operation in darkness. 


POWERING ON

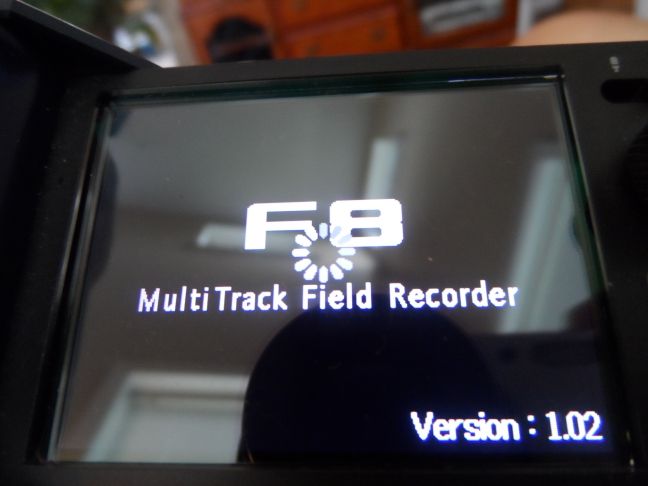
Turn the F8 on and off from the ‘Power’ button at the front lower right (green backlight).  This button requires approximately one to two second push-and-hold to change from off-to-on and vice versa, making accidental pushing difficult.  Immediately on power up, a generic black and white ‘Zoom’ screen appears for about five seconds.  This is followed by another black and white introductory screen for about two seconds that provides the firmware version.  Therefore, it takes around ten seconds for the unit to power on from the initial push of the on button until it’s ready to record.  On initial power up, the user is asked immediately to enter the date and time.


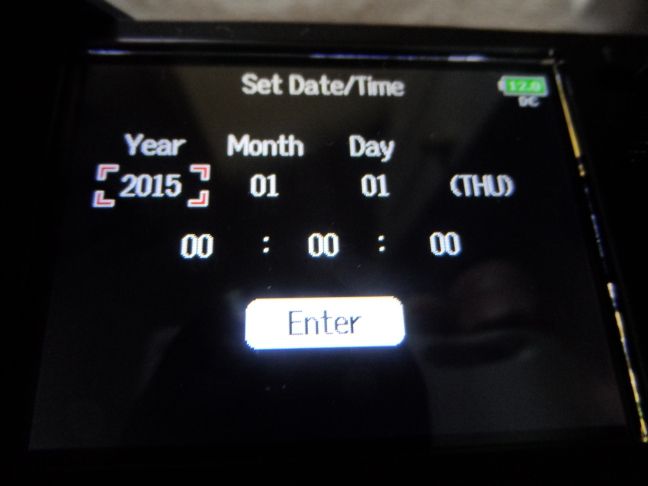
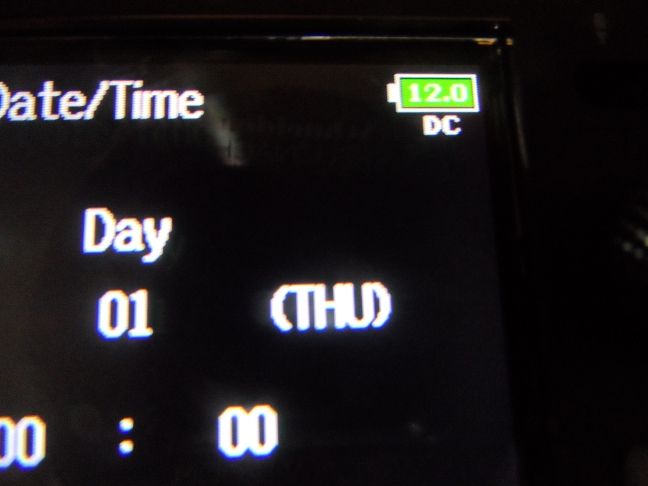
Upon entering date/time information, I noticed the voltage indicator in the upper right corner of the screen.  This indicator provides a voltage reading of the active power source and is present on every screen.  I love having actual voltage reading on the power indicator instead of idiot bars.  This is another pro feature of this unit.  A nit-pick comment is that it is difficult to read the white font voltage reading on a light green background.  (This comment probably isn't obvious from looking at the enlarged photo, but the size of the icon isn't large and reading from a distance is difficult with this color combo.)


The first thing I did upon firing the unit up was toggle through all of the menus.  My first impression was that the menus are intuitive and easy to navigate.  After two months of use, that first impression hasn’t changed, though there are certainly a few minor things I’d change if I were designing the menu myself.  (For example, since ‘format’ is by far the most used function on the SD card menu, I’d move it up to number 1 on the menu.  Presently, it’s number 3.)  However, nothing significant of consequence comes to mind with respect to the menu.  Refer to Section 5 for a comprehensive overview of the menu contents. 


EASE OF USE/SETUP

Generally, the Zoom F8 is intuitive and simple to use.  The track key/channel select and PFL buttons associated with each channel allow for quick setup and minimize the need to fumble through menus if time is short at the start of a show.  The functions of the PFL button can also be accessed through the menu.


PRE-RECORD

The unit has a pre-record function that is fixed at six seconds for most of the recording resolutions.  At higher sample rates (88.2 kHz and above) the fixed pre-record duration decreases.  There is no capability to change the pre-record duration, just turn it on and off.


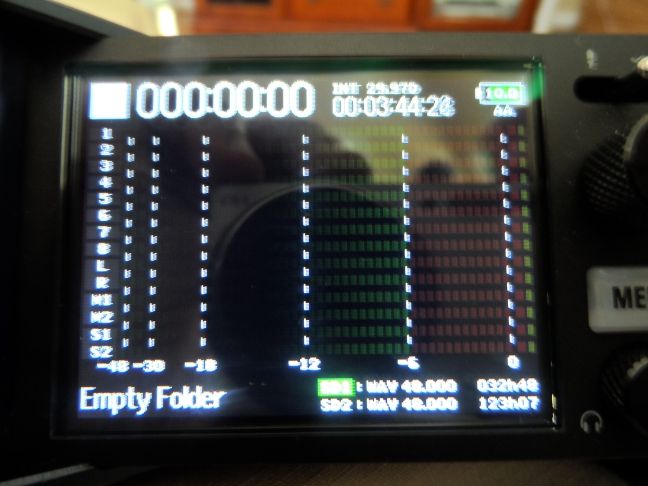
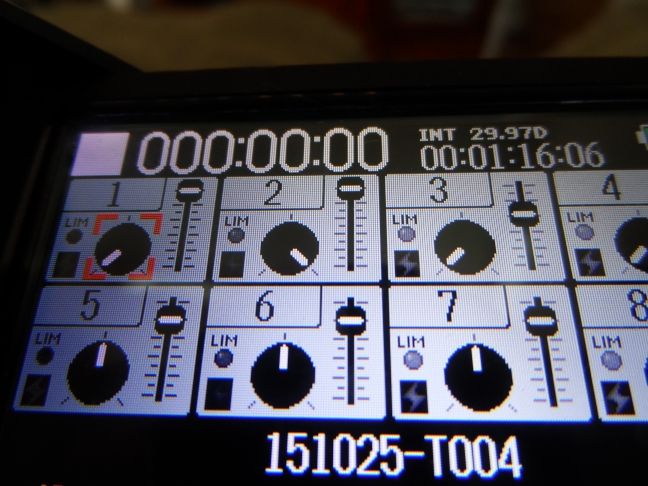
DISPLAY AND METERING

The display screen is colorful and bright.  Level meters/clip indicators in the main display have great resolution.  In one mode, the level meter displays as ‘bars’ which are similar to the infamous lights on the Sound Devices units.  The resolution of the level bars for setting and matching levels between channels is very good with lots of bars.  The scale on the level meters is linear, but not really.  Between -18 and 0 dBFS, each bar is a ½ db step, so for example there are twelve bars between -12 and -6 dBFS.  Between -18 and -30 dBFS, the bars are graduated at 2 db per bar, so there a total of six bars between -18 and -30.  There is a peak level indicator (with user defined hold duration), but there is no associated numeric digital peak readout (which shows the actual peak value in X dBFS) accompanying the level meter.  However, with the good resolution and scaling of the meters I don’t miss feature.


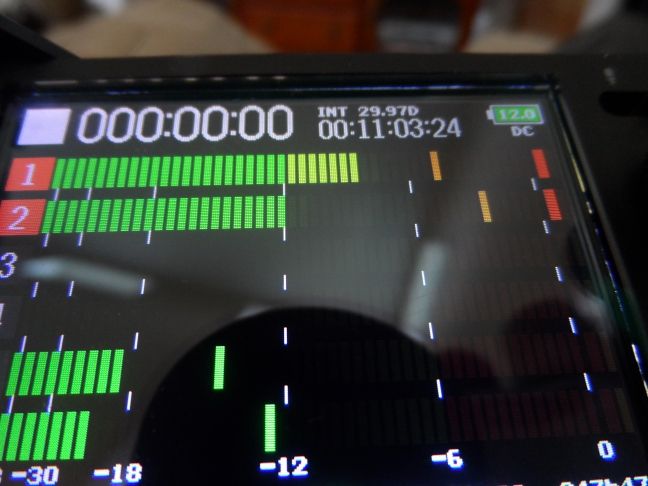
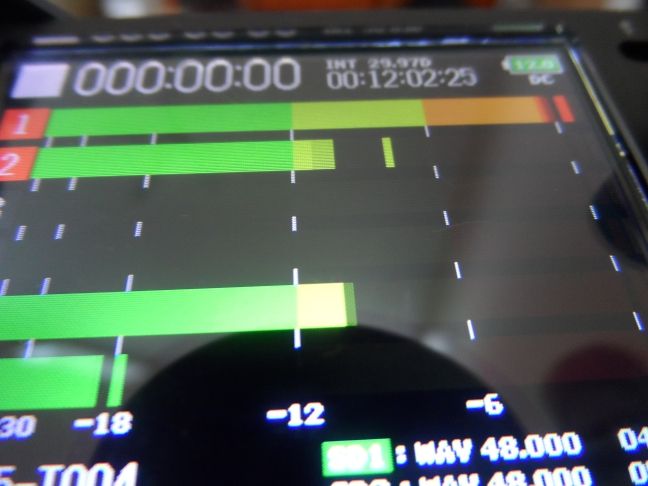
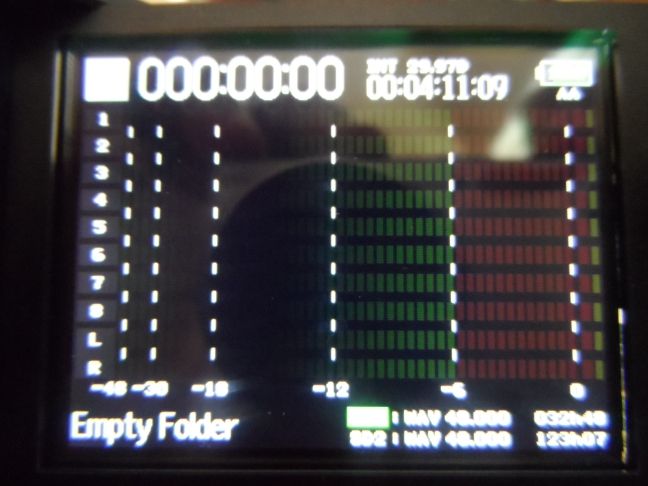
If desired, the user can also choose a continuous level meter mode where there are no bars, but the meter is a single solid bar.


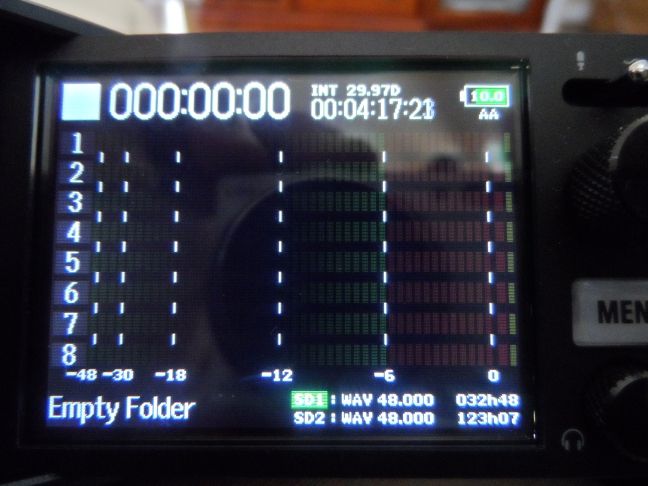
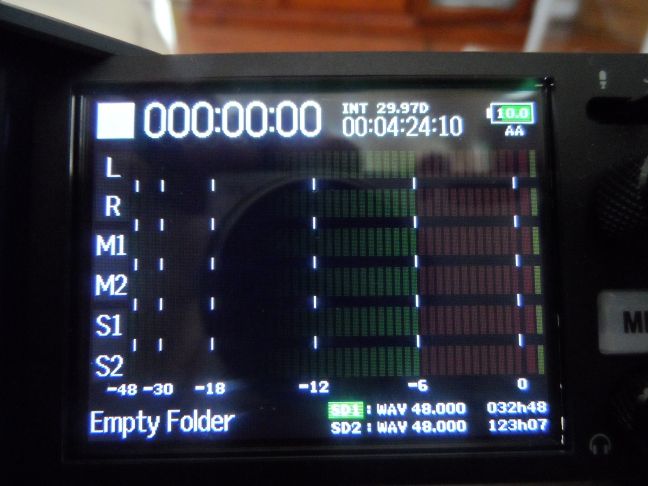
There are four user definable monitoring screens available for monitoring input and output channels.  The following are the four default screens.  Rotating through these screens is accomplished by turning the select encoder knob.  (Refer to the menu section, at 8.5.4, for options available to the user for customizing each of these screens.)


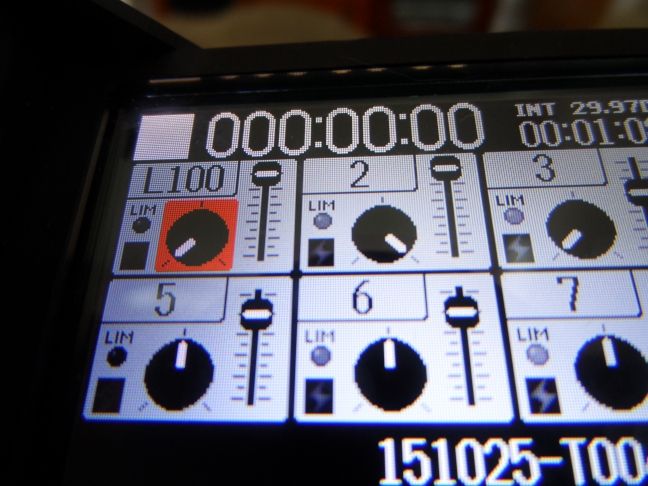
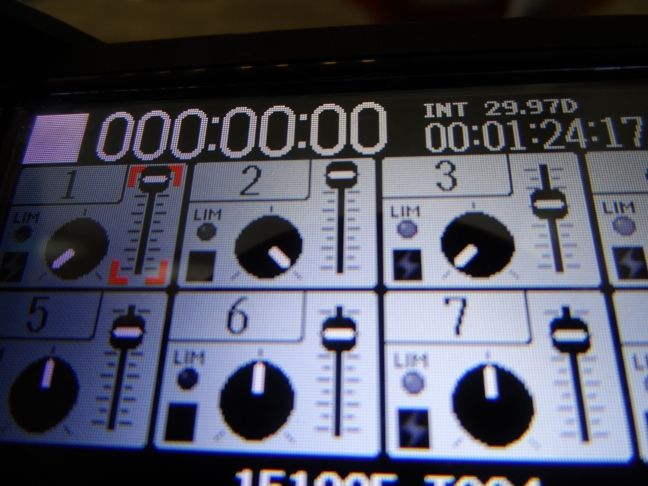
After toggling through each of these four monitoring screens, a fifth screen appears.  This is the mixer screen.  The mixer screen provides the user with the basic capabilities of a channel mixer for controlling the signals that are sent to the headphone or either the Main or Sub outputs.  As the user continues to rotate the select encoder knob, each of the channels of the mixer are toggled through.  There are two specific controls available on each mixer channel; pan and level.  To activate pan control for a channel, use the select encoder knob to locate the channel desired and highlight the pan setting.  While the pan setting is highlighted, push-click the toggle knob to select pan and rotate to pan left from 0 through 100 (percent pan left from L0 through L100) or pan right from 0 through 100 (percent pan right from R0 to R100).  When the desired pan setting is reached, push-click the select encoder knob a second time to lock the selected pan setting.  Rotate the toggle knob to highlight and select the mixer level setting for each specific channel using the same routine as just described for setting and locking the pan setting.


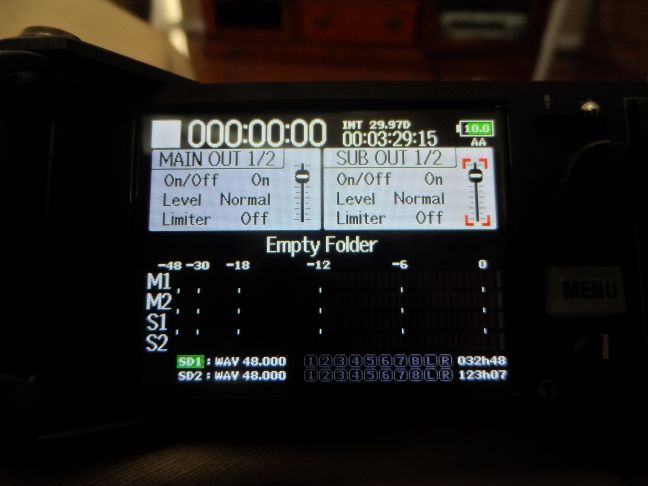
Once the user toggles through both controls on each of the eight channels, additional rotation of the select encoder knob takes the user to the output mixer screen.  The output mixer is similar to the channel mixer described above, except it is used to set parameters for the Main and Sub outputs.  The first item is for turning the Main or Sub Outs on and off, the second item sets the level trim to normal or mic (this is similar to a high and low gain scale, but is applied only on outputs), the third item turns the output limiter on and off, and the final item is a slider level control.  Once the user toggles through each of these four controls for both the Main and Sub outputs, additional rotation of the select encoder knob returns the user back to the first of the four monitoring screens.


INPUT CONTROLS AND LEVEL HOLD

All of the inputs (channels 1 through 8 ) record directly to SD card as pre-fader inputs.  These inputs can be modified by PFL settings, such as high pass filter and the limiter, but the mixer has no effect on any of the input signals being recorded onto the SD cards.  The unit has the capability to record summed L and R channels to the SD cards either pre or post-fader.  Similarly, the main and sub outputs, when active, can be set up either pre or post-fader. 

There is a level hold function available by pressing STOP and any of the PFL buttons simultaneously. This prevents any of the levels from being changed during recording.  The function is confirmed with a ‘yes’ selection on the main screen after the buttons have been pressed.  Repeat the action to cancel the hold.

In order for the level hold function to be implemented, the user must invoke the hold prior to starting to record.  That seems odd, since most users normally don’t finish setting their levels until after the recording (and/or music) has started, especially with eight channels to balance.  An additional concern with the hold function that was initially expressed was accidentally stopping a recording since one of the two buttons pressed to invoke the level hold is the STOP button.  However, since the hold cannot be invoked while a recording is in progress that is not a concern.  So, on the one hand it's good that the user can't accidentally stop the recording once you hit record, but on the other hand that level hold is the only hold function on the machine and functionally probably doesn’t provide much use since most users will need control of their levels after the recording starts.  I'd like to see a more comprehensive and better applied hold function in a firmware update.

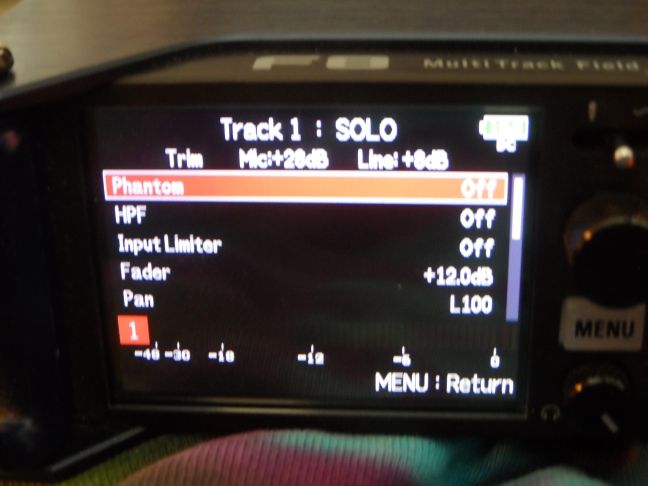
As stated earlier, the eight microphone inputs are combo jacks where the XLR inputs is used for mic in signal and the TRS jack is used for line in.  A press on the PFL button (repeated below from earlier screenshot) shows that the mic in is 20db more sensitive than line in.  I noted earlier that the level meters don’t have accompanying numeric peak level indicators.  However, when the PFL buttons are pressed, the resulting screen displays the corresponding setting of the level knob, based on whether the input is a mic-level input or a line-level input.  Using this screen, the level knobs can be set to a precise point, if desired.  For example, if the user wanted to set the input gain on all of the channels at precisely the same level, this screen would be used to do so.


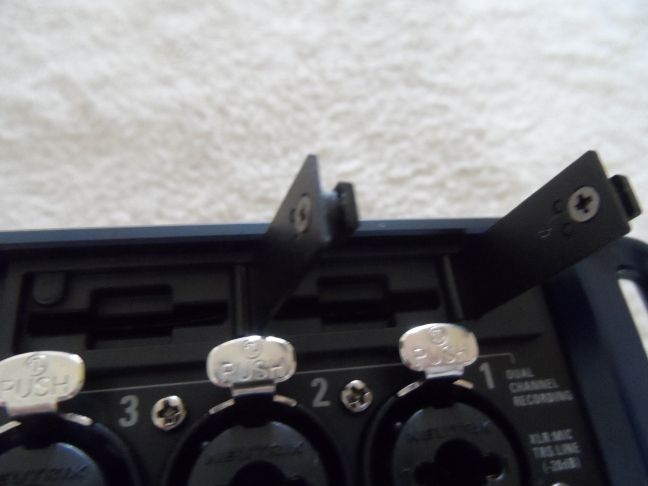
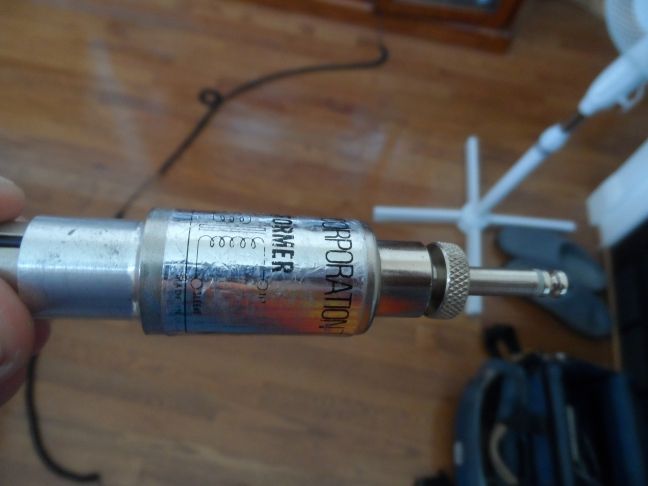
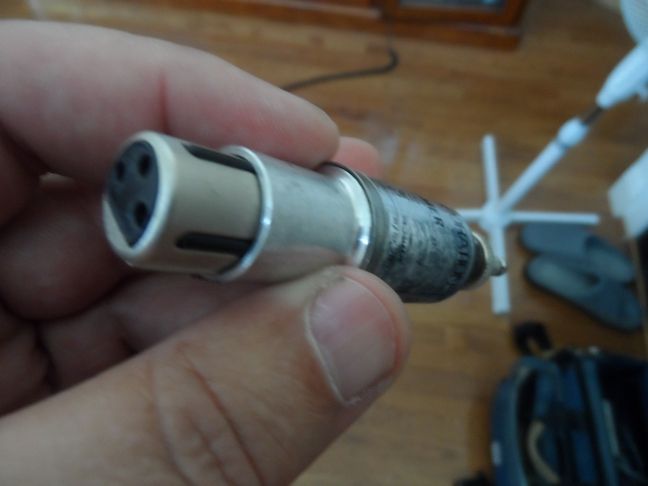
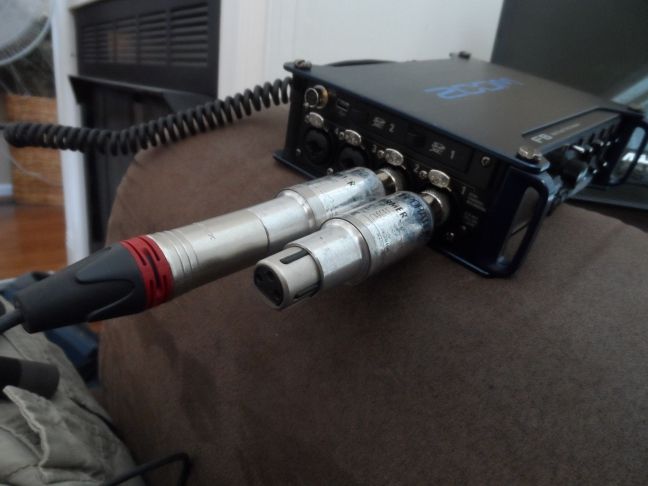
I record loud amplified music.  Generally, using the XLR connectors as a mic level input hasn’t been limiting.  However, to date I’ve attended one show that was very loud with powerful low end that challenged the amount of headroom available with mic level inputs.  I’m not thrilled with the idea of going away from locking XLRs, but I don’t want to encounter a situation in the field where I can’t use the line in option, so I’ll be switching over the TRS cables.  For high gain preamps, such as the PSP-2 users will certainly need to use line in.  I don’t currently have a pair of TRS input cables, so in an emergency I have a pair of XLR > TRS converters…though as the last photo below shows they are a bit cumbersome when installed.


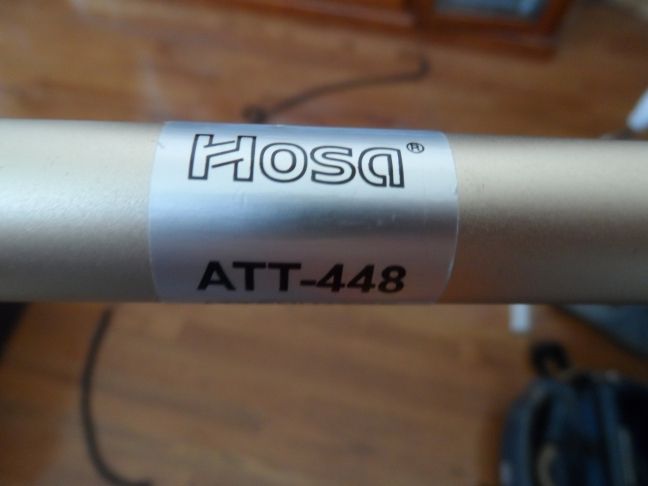
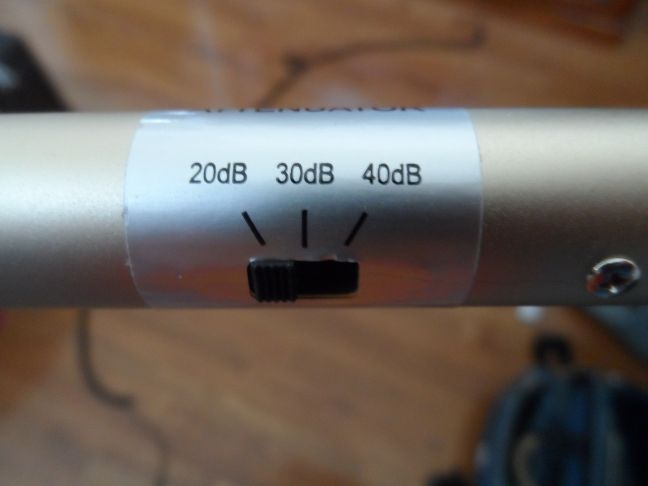
Another less than ideal option are inline attenuators, such as shown below. 


MONITORING AND THE HEADPHONE AMP

The prevailing sentiment of early commenters of the Zoom F8 (that I’ve read) disliked the headphone amp on the unit.  Those commenters were clearly coming from a different place than me because I find the monitoring capabilities of this unit to be outstanding for my needs.  In fact, the controls associated with the headphone amp makes this more useful for monitoring than any recorder I’ve ever owned. 

The problem I’ve had with literally every built-in headphone monitor (until the Zoom F8) is that it’s not loud enough for effective monitoring in the live music setting.  That issue is solved with this unit.  While I agree with commenters that the quality of the sound from the headphone amp may not be terrific, but sound quality from the headphone amp is a secondary priority to me, since the purpose of my headphone monitoring needs is to monitor the recording for problems in the recording process, such as making sure the recording isn’t clipping, or to help in diagnosing where there might be a noise source.  With sufficient volume on the headphone amp of the F8, this is much easier accomplished in the field after the show has started.

More specifically, there's lots of flexibility available for monitoring.  The headphone monitor can be set to monitor individual channels in mono, stereo pairs, or the L/R pair.  Any of the input channels can be routed in any combination to the L/R output pair for monitoring either pre or post-fader.  Therefore, by monitoring the L/R pair post-fader, you can use the mixer to add gain to the headphone amp without having any effect on the recorded inputs. 

So, let’s say you like to record your inputs so they’re peaking between -12dBFS and -6dBFS to ensure that there is plenty of headroom to avoid channel peaking during a show.  On most recorders, that would also mean that the headphone levels would also be correspondingly low and monitoring might be difficult since it would be hard to hear that level (even at full headphone amp volume) once the music starts.  On the Zoom F8, simply set up the headphone amp to monitor inputs post-fader and use the mixer to add gain to whatever level you need in order to be able to hear during the show (within reason, of course since you can also overload the headphone amp by adding too much gain with the mixer but there’s an output limiter that can be turned on in that case).  So even though you might be recording at -12dBFS, you can be monitoring post-fader at 0 dBFS or greater if desired. 

In addition, as already mentioned, the headphone amp has its own gain control (located directly below the menu button).  Just for reference, with the headphone volume knob turned all the way up and monitoring output channels at 0db with a signal peaking around -6dBFS, the sound from the headphones is LOUD.  Even though I was at a show and the music was also loud, I could literally feel the low end rumbling on my ears with a pair of ATH-M50 headphones.  So caution is needed not to blast your ears too much with this fantastic feature.


BLUETOOTH AND REMOTE OPERATIONS

The Bluetooth interface is a handy tool that many users will really enjoy.  It is currently only available to iphone/ipad users as an IOS app.  In the first couple of months of ownership, I’ve used the interface a lot and find that it’s useful, but not essential to my own needs.  I primarily use the app for monitoring of my recording after everything has been set.  The old days of opening your bag every so often to check power and levels are over with this app. 

The app can be also be used for control via the mixer screen which is accessed from the main screen by tapping the mixer button.  On first use, the level sliders and knobs seemed difficult to control with accuracy on the small screen of my iphone 5s.  Sliding your finger or thumb up and down on the face of the iphone was difficult to do with the accuracy needed to dial in a precise level.  However, a friend provided a valuable tip that proved helpful and drastically improves the ability to control levels from the app.  When engaging a specific slider or knob, while keeping your finger or thumb depressed on the screen, simply rock your thumb or finger up or down on the screen.  Once a specific level is reached, release from the screen to lock in the setting.  Rocking up and down changes the levels in 0.5db increments.  This technique is simple and, yet very accurately controls slider and knob movement.  Double tap the slider to return it to the default setting of 0dB.  Double tap the level knob to return it to the default setting of 20db.   

In addition to controlling levels, the main screen provides all of the basic controls of the recorder, such as REC, STOP, PLAY/PAUSE (for inserting marks), which are all easily performed from the app.

Once recording has started, Bluetooth cannot be turned on.  However, it can be turned off to conserve power. 

Although the app will disconnect from the F8 (for example, if the iphone goes out of Bluetooth range) I have not experienced complete shut-downs between the F8 and my iphone.  The difference between a complete shut-down and a disconnect is that the iphone can be reconnected while recording when it disconnects.  The iphone disconnects if I minimize the app on my phone or if Bluetooth goes out of range.  If the app is shut down completely on your device, you cannot reconnect to Bluetooth without first stopping your recording and restarting Bluetooth.   

Bluetooth range is about 40 to 50 feet unimpeded.  I wandered around a crowded audience and it disconnected around 15 feet or so.  Similarly, if there are objects impeding the space between the phone and the F8, the range will decrease. 

There is no lock or button disable feature on the app, so accidental screen touches will be an issue for anyone wanting to leave the app active on your device for remote monitoring.  Because of this concern, I minimize the app frequently to prevent any accidental screen touches or ‘butt dialing’.  My feeling is that this is a sub-optimal solution that amounts to a workaround and would like to see this addressed in the future.

There is very little latency between the F8 and what is seen on your device.  I found it to be barely perceptible and is not an issue.


« Last Edit: November 20, 2015, 07:55:02 PM by tonedeaf »

stevetoney

  • Guest
  • Trade Count: (0)
Re: Review - Zoom F8
« Reply #2 on: November 01, 2015, 08:23:00 PM »
2.0   PREAMPS

The first question people seem to be curious about with the Zoom F8 is whether or not the preamps are up to snuff, particularly since Zoom’s older lower end products had a reputation for not being very quiet.   The unit is marketed as having low-noise high quality pre-amps and with eight on-board channels.  At the price point offered, the curiosity factor was justified. 

Cutting straight to the bottom line, in my personal opinion the pre-amps perform very well.  They’re quiet and deliver a very nice transparent sound.  I’ve been a fan of high quality external portable preamps for a long time and have tried almost all of those that are coveted by tapers.  I’m not a pro, but based on my own comparisons with the preamps I’ve used, I’d rate the Zoom F8 preamps around a couple of notches below the best of the best.  The following paragraph attempts to provide some context to that statement. 

I thought about simply rating on a ten point scale, but I didn’t want specific ratings to cloud the overall message that I’m trying to covey, or to cause anyone to get caught up in a specific numbers game.  While the preamps, in my opinion, aren’t the best I’ve heard, I don’t really feel that’s a knock, because they still sound REALLY good…and there’s eight of them!  Also, my opinion stated in this section is solely based on overall preamp sound.  Obviously, preamp reviews can rate a preamp up or down based on features other than sound.

The internal preamps are as good as I’ve owned in an all-in-one recorder and I think sound at least as good as the Sound Devices 744/722/702 series, which until this point have been the best sounding internal preamps I’ve owned.  From memory, the 744/722/702 have a slightly bright presentation while the Zoom F8 is warmer, with a fuller low end.  Caveat that this statement is from memory and not based on a side-by-side listen.  (Note: I haven’t owned a 788 or any of the newer generation of Sound Devices products so can’t comment on those…they’re said to have improved preamps over those installed in the older 744/722/702.)

Of the stand-alone portable preamps I’ve owned, my gold standard preamp for sound is the EAA PSP-2.  I haven’t heard a preamp that sounds better, so the PSP-2 is the standard bearer when I evaluate sound.  One notch down from the PSP-2 are a group of portable preamps that I like about the same and sound-wise feel they rate equally.  Those are the AETA PSP-3 and all of the versions of the Schoeps VMS (I’ve owned them all except the VMS42UB), followed very slightly by the Sonosax SX-M2 and Oade M148/M118.
 
To my ears, the internal preamps of the Zoom F8 come in right behind all of the above preamps.  Again, that might not sound like a great endorsement, but trust me all of the preamps mentioned are REALLY good.  I’m just trying to provide some kind of context so those experienced with any of these preamps can use this information to help with setting expectations.

PLEASE don’t use my ears as final say-so though.  Sound preference is very subjective and everyone is wise to listen as much as possible to make up their own mind.   In fact, your own ears need to be the final judge, so it’s good advice to take my summary with a grain of salt.  To that end, I’ve included links below to some recordings that I’ve made with the Zoom F8.  I’ve tried to include pertinent information so that you’ll be able to fairly assess what you’re hearing.  Listen for yourself and reach your own conclusion.

One suggestion for listening to these samples would be to download the actual files and, if possible, listen through your highest quality home unit.  Archive.org provides a player, but they play the MP3 version of the file and even then what you hear on your computer’s built in sound hardware is low quality in comparison to downloading and listening through whatever higher quality home listening devices you use. 

Note that all of the linked samples are raw recordings.  The only post-processing that was performed other than tracking out the recording was to bring the recording levels up to a normalized value.

****

Jonathan Scales Fourchestra is a three piece steel drum band.  You’ll hear samplings of the higher end tones of the cymbals and steel drums, along with the lower end bass sound.  This was recorded in a small-ish Pittsburgh club that holds around 150 or 200 people.  Mics are stand-mounted about 9 feet high and about 15 feet from stage front.

https://archive.org/details/jsf2015-10-03.mk4_24bit

****

String Cheese Incident performed at Stage AE in Pittsburgh, which is a mid-size indoor venue that holds around 2500 or so.  Mics are stand mounted at the SBD area, about 70 or 80 feet from the stage.

https://archive.org/details/sci2015-10-20.mk4_24bit

****

In order to provide a comparison between the Zoom F8 preamps and an AETA PSP-3, I ran four Schoeps m934b/CMMT30 mics into the F8, two channels direct and two channels through the PSP-3.  Jazzam is a Pittsburgh favorite of mine that recently reunited for the first time in a couple of years to dust off some of their tunes.  This was recorded in the basement of a restaurant bar in a small room that holds, at most, 75 people.

F8 Preamps…no outboard preamp

https://archive.org/details/jazzam2015-09-10.934b_24bit

AETA PSP-3 > Zoom F8

https://archive.org/details/jazzam2015-09-10.m934b_24bit

****

Finally, back at the Thunderbird Café, Mister F is a four piece band with a rock edge.  I recorded them with slightly different mics, but the MK4 and the M934B are very close to each other sound-wise.  Once again, one pair of mics was recorded direct and the other through the AETA PSP-3.  This is probably a less accurate comparison than that provided above, but still should provide a bit of flavor for sound of the F8 preamps.

F8 preamps…no outboard preamp

https://archive.org/details/misterf2015-10-22.m934b_24bit

AETA PSP-3 > Zoom F8

https://archive.org/details/misterf2015-10-22.mk4_24bit

****

One final note to add is that I recently attended a couple of outdoor festivals and used the F8 in various combinations with and without the outboard preamp.  You can search archive.org for those results, if desired.  However, I didn’t link to those because I’m not sure which of the recordings I may have altered with my software (EQ being the main tool I use).

While everyone can reach their own conclusions from doing your own listening, I think most will agree that the F8 preamps hold up quite well in comparisons against the PSP-3.  While I can’t say that they sound as good…to my ears the PSP-3 provides a slightly nicer soundstage...but then again the PSP-3 is a world-class performing all-star.

Overall, I have no problem saying that the Zoom F8 is equipped with preamps that perform admirably.  I’ve been more and more tempted to leave the house without bothering with any of my other preamps.  Less equipment, fewer cables and batteries, quicker setup and teardown, and just generally less that can go wrong.  This comment is even more impressive when compounding the preamps results into EIGHT channels…and again there’s the price point (I know…I keep coming back to that).


TEST OF PREAMP VARIATION

A test was performed to determine the variation of the eight preamps.  Adobe Audition was used to play 1000hHz tone through my Geek Out USB audio interface from the USB connector on my laptop.  From the 1/8 output jack on the USB interface, a 1/8 inch mini jack > XLR cable was connected.  The XLR end of the cable was connected to Channel 1 of the Zoom F8 to record the tone.  The Channel 1 level knob was adjusted to provide of +30db mic in/+10db line in, then the volume of the test tone was adjusted on the computer so that the recorded signal on the Zoom F8 was peaking around -5dBFS on the level meters.  Once this volume was set on the computer, it wasn’t changed for the duration of the test.  Then the level knobs on the other seven channels were also set at 30db mic in/10db line in.  The test tone was then recorded through each channel.

To determine the variation in the preamps, each of the recorded files was loaded into Audition and a peak analysis was performed on each file.  Here are the results:

Ch 1   -4.80dBFS
Ch 2   -4.84dBFS
Ch 3   -4.84dBFS
Ch 4   -4.80dBFS
Ch 5   -4.84dBFS
Ch 6   -4.83dBFS
Ch 7   -4.79dBFS
Ch 8   -4.77dBFS

The data shows that there is only 0.07db variation across the eight preamps; which is very consistent output from the preamps.
« Last Edit: November 20, 2015, 08:09:11 PM by tonedeaf »

stevetoney

  • Guest
  • Trade Count: (0)
Re: Review - Zoom F8
« Reply #3 on: November 01, 2015, 08:23:55 PM »
3.0   MEDIA AND STORAGE

FILE STORAGE

As shown in the first section, the Zoom F8 has a pair of SD card slots.  The cards in either slot don’t need to be the same size.  When one of the cards fills, it will simply stop writing data but data is still recorded to the other card.  The manual cautions against removing a filled card without stopping recording first.  If a card is pulled out while the recorder is still recording to the other card, the removed card may be corrupted. 

The setup screen enables the user to save different information to each SD card.  However, there is currently no option to record the cards in a series with each other, for example, such that when one card becomes full the other card would start being recorded onto.

Each of the slots accepts SD, SDHC, and SDXC card media.  I’ve successfully tested and used micro-SDHC and micro-SDXC cards using an SD card adapter; however, up to now the most I’ve recorded to is four channels.


APPROVED MEDIA LIST

Zoom has published a list of approved cards on their website.  This list includes a good variety of cards and brands up to 128gb.  As of this writing, even though the specifications say it accepts cards up to 512gb, there are no 256gb or 512gb cards on the approved list. 


SD CARD PERFORMANCE TEST

The unit includes a card performance test feature.  I have a fairly extensive collection of cards, so I ran all of my cards through the performance test to check how picky the unit is with cards.  The performance test has two options; quick and full, and returns a result of ‘OK’ if the card passes the performance test and ‘NG’ (not good) if the card doesn’t pass the test.  The quick test takes around 20 to 30 seconds for most cards.  The full test takes roughly 47 minutes per 16gb, so I used the quick test option on all of the SD and micro-SD cards that I own.  Here are the results:

SD Cards
OK - PNY Premium 32gb Class 4
OK - Sandisk Ultra Plus 16gb Class 10 (40mb/s)
OK - Lexar Plantinum II 64gb Class 10 (200x)
OK - Sandisk SDHC Card 32gb Class 4
OK - PNY Premium 16gb Class 4
NG - Patriot LX Series 128gb Class 10

Micro-SD Cards in an SD Card adapter
OK - Adata 32gb Class 4
OK - Sandisk 16gb Class 4
OK - Sandisk Ultra Plus 64gb Class 10
OK - Sandisk Ultra 8gb Class 10

In the past couple of years, I've purchased two fake micro-SD cards off of ebay.  I was curious how the F8 would read those.  In one case, it wouldn't even recognize that an SD card was inserted into the slot, in the other case it returned the 'invalid card' message. 

I use a 128gb PNY micro-SD card in my Fiio X3 music player.  This card is close to being full and it functions fine in my player.  I was curious what would happen if I ran the test on this card, which I didn’t reformat in the F8 since I didn’t want to lose the music on the card.  The unit returned an ‘invalid card’ message, which the manual indicates happens when a card isn’t formatted correctly for use in the F8. 

It’s probably worth noting that the performance test is to confirm whether the card can be used in the Zoom F8.  An NG result doesn’t mean that the card isn’t any good; only that it won’t work in the Zoom F8.  Since the F8 needs a card with fast enough write speed for ten channels of data to be written simultaneously, a card might still be a good card but simply not be fast enough for use in the F8.

The reader is cautioned that none of the cards tested above are on the approved media list.  While I’ll probably continue to use what I already have, you probably shouldn’t use my list to inform your card purchases, though my experience seems to indicate that a card that is returned from the test as OK will work fine in the unit.


DATA WRITING UPON POWER INTERRUPTION

The marketing information states that files are saved periodically during recording to provide an extra level of protection in the event of unexpected file interruption, for example, power loss or the removal of an SD card.  To test this feature I started recording and unplugged power. 

The result of this test is that it seems that the unit will write data up to within the last minute of losing power.  For example, I recorded for 58 seconds and unplugged power.  Nothing was saved.  I repeated and this time let the recording go for 63 seconds and the second time 60 seconds was saved.  Therefore, it seems from this test that the F8 writes data to the card in one minute chunks. 

If the recording is interrupted by a power outage, the F8 may lose up to a minute of the recording, but if the interruption happens immediately following a save cycle, it’s possible that only a few seconds would be lost.  In any case, it seems no more than a minute of a recording is subject to be lost.
« Last Edit: November 20, 2015, 08:17:48 PM by tonedeaf »

stevetoney

  • Guest
  • Trade Count: (0)
Re: Review - Zoom F8
« Reply #4 on: November 01, 2015, 08:24:56 PM »
4.0   POWERING

The Zoom F8 can be powered from three different sources; the AA battery tray/sled, the 12V connector on the rear panel, or the 9-16V hirose connector on the left panel. 

The hirose connector is a four-pin connector (though only two of the pins are actively used) that locks onto the corresponding socket to prevent accidental disconnects.  When powering from this connector, an external battery of voltage between 9V and 16V can be used.  To provide the correct low voltage alerts, the user should set the proper low voltage shutdown settings in the menu (see Section 5).  Unfortunately, Page 20 of the user manual (see Hint box) states that the manual specifies the shutdown voltage that should be set for the external DC power supply; however, this information is not provided in the manual.

The AA battery tray/sled was already described in Section 1. 

The connector on the rear panel accepts the power supply (wall wart) provided with the unit.  This connects to an AC wall outlet.  As noted in the pictures, the voltage at the connector is 12VDC.  (The wall wart is a power transformer that coverts 120VAC, or 220VAC in some countries, to 12VDC at the output of the transformer.)  I checked the generic connectors that came with my Tekkeon 3300 batteries and one of those connectors fits perfectly onto the 12V power input on the back of the F8.  The connector on the unit is recessed and the adaptaplug connectors are right angle, so when inserted, the right angle connector fits perfectly snug into the socket while also hugging the back of the unit close enough so that when it's sitting in the bottom on a gear bag there's no concern with the cable coming out of the bottom of the unit into the bottom of your bag, especially since the weight of the unit is holding the right angle connector in place.   


When there is an external battery connected on the rear 12V jack and batteries in the AA tray/sled, the unit will draw power from the 12V connector until it is either disconnected or the battery goes dead. Prior to battery depletion, the low voltage setpoints for a 12V battery are in effect.  Upon depletion or disconnect of the 12V supply, the unit switches automatically to being powered from the AA battery tray/sled.  This switch is seamless and there are no audible clicks or drop outs on the recording. 

The manual (page 20) states that the same sequence occurs on depletion or disconnect of the hirose connector with AA batteries installed. 

This is a handy feature that allows the user appreciable flexibility for running the unit for extended time periods with the possibility of not shutting down.  For example, with the external battery as the main power source and AA’s as backup, the unit could be run continuously until the external battery depletes.  As soon as the unit switches to the AA’s, the depleted battery can be replaced with a fresh battery.  As soon as the fresh battery is connected, the unit would switch off of the AA’s and back onto the fresh battery.  In theory, as long as there is power remaining on the AAs, this process could be repeated many times without ever having to shut the unit down.

Though I’m not sure why anyone would need to power the unit from both external battery jacks, an interesting experiment would be to connect both to see which the unit pulls from.  I suspect the sequence would be higher voltage first, the same as the above sequences where the AA’s come on second.

I have not performed any detailed run-time tests in multi-channel modes and/or with output channels on.  However, with simple two channel recording the F8 ran for about 10 hours from one of my Tekkeon 3300 batteries.  Phantom was on 24v (my schoeps mics only needed 12v) recording two channels only, but with the headphones plugged in and on the entire time.

The Tekkeon 3300 capacity is 40 watt-hours; therefore, at 10 hours of run-time, the current draw by the F8 was:

(40 watt-hr x 1 volt-amp/watt x 1000 ma/amp) / (12volts x 10hr) = 333 ma.

It’s clear that my run-time example was not conducted with the unit drawing anywhere near full capacity.  At the same time, with everything going on with this unit (LEDs flashing and bright colorful display) this is an impressively low power draw. 


AA BATTERY RUN-TIME TEST

I checked out the run-time using eight 2300mah NiMH Energizers (model NH-15-2300) by doing two separate tests.  The results are shown below:

Test 1
Starting Voltage 10.2V
Shutdown Voltage 9.0V
Run Time - 3hr, 46min

Test 2
Starting Voltage 10.3V
Shutdown Voltage 9.0V
Time - 3hr, 58min

Notes:

- Both run time tests were done with the F8 in the following condition.

Sample freq and bit depth - 24/48
Channels Armed - 4
Phantom Power - On, 48V
SD Cards - Recording to both SD1 and SD2
LED/LCD Brightness - 60
Outputs - Off
Timecode - Off
Headphone - No headphones connected

-  I chose the above configuration because that seems to me to be a configuration that tapers will use alot in the field.

-  I've purchased several batches of Energizer AAs over the last few years and haven't kept track of which batch is which.  I was concerned about mixing new and old for this test, so I put a fresh charge on all of the batteries by first discharging the batteries in the charge unit and then recharging.  Both discharge/recharge cycles indicated that the batteries took the full charge, since my charge unit showed all eight batteries took between 2300 and 2500mah on the recharge cycle.  So I think that's a good indication that all eight batteries used in this test are still performing well.

-  There are three run time cases provided on page 139 of the manual.  The middle case shows a run time of 6 hrs or more with 2450mah NiMH batteries, eight channels being recorded at 24/48, SD1 only, outputs off, 32ohm headphones on, time code off, LED/LCD brightness at 5, and phantom power off.  While the conditions of this case were quite different from my test, the results seem consistent enough with the manual that it seems my test was a valid one.

-  To validate the run-time tests, I ran a test with the same settings as Zoom used for the scenario shown above (middle case on Page 139 of the manual) which resulted in a run-time of 6 hours or more.  I got 5 hours, 32 minutes.  Note however, that Zoom used 2450mah NiMH batteries and mine are 2300mah.  Given the difference in battery capacity, my results seem consistent with Zooms, which fairly well validates that my batteries are good and that the run-time tests I performed are good tests.
« Last Edit: November 24, 2015, 07:08:34 AM by tonedeaf »

stevetoney

  • Guest
  • Trade Count: (0)
Re: Review - Zoom F8
« Reply #5 on: November 01, 2015, 08:26:01 PM »
5.0   MENU DETAILS

In this section, I have included details for the menu on the F8, which I found to be intuitive and easy to use.  To activate the menu, push the rectangular ‘MENU’ button located directly below the select encoder wheel.

Note:  In order to make referring back to this section as simple as possible, I’ve included below a sort of number system to accompany the pictures, which also corresponds to the format of the menu.  The highest level menu items are identified by the first number, the next level by the second number, etc.  If this seems confusing, please just continue on…I think it will be clear what I’m talking about. 


FINDER

The FINDER function is the first item in the main menu.  Its main purposes are file operations, such as navigation, file information, and file deletion.   

1.0

When selecting FINDER from the main menu, the first sub-menu encountered requires you to select which SD card you want to work on.

1.1

To change the SD card you want to explore, use the encoder wheel to select an SD card > option > select.  Notice in the last photo that the active SD card has changed to SD2.

1.1
1.1.option


This screen is used to navigate the files on the card for editing (copy, delete, etc) or getting file information.  In this case, I hadn’t recorded anything to either of the cards yet, so there are no files shown in the menu.

1.1
1.1.1
1.1.1.1
1.1.2
1.1.2.1


INPUT

The purpose of the input function in the main menu is to define all of the functions that will be applied to the eight XLR inputs on the Zoom F8.  For example, this part of the menu is used to set phantom power, input limiter, low pass filter, etc.

2.0

The menu choices under the INPUT section are HPF, input limiter, phase invert, phantom, plugin power, and input delay.  Each of these selections and their sub-menu’s are shown below.

2.1
2.1.1
2.1.1.1
2.1.1.1

Here’s an example of the HPF screen with a couple of the inputs having their HPF frequencies defined and the others left off. 

2.1.1

The following pictures show the screen selections available for the input limiter.  I haven’t shown all of the selection screen associated with the limiter, but notice on the second photo all of the different menu options available for defining the detailed limiter settings.

2.2
2.2.1

The third choice under the INPUT menu is the Phase Invert option. 

2.3

You have the option to invert the phase for each channel with an simple OFF/ON selection.

2.3.1
2.3.1.1

Phantom power option is the next selection in the INPUT menu.

2.4

The first selection under the phantom power screen is whether or not you want phantom power delivered to each of the eight channels.

2.4.1
2.4.1.1

The second selection under the phantom power section is the selection for the phantom voltage between 24V and 48V.  Note that this option is not channel specific…you define a phantom voltage for all channels and cannot have different phantom for different channels.

2.4.2
2.4.2.1

Plug In Power (On/Off) is the next INPUT selection option.  The manual says to make this setting when a mic that is compatible with plug-in power is connected to the mic capsule’s MIC/LINE input jack.  The submenu options here are simply to toggle plug in power on and off.

2.5
2.5.1

The sixth INPUT menu choice is to set the input delay time.  The purpose of this option is to compensate for potential latency between inputs that may be located at different recording locations.  For example there might be sound latency between soundboard inputs and audience mics.
 
2.6

As for other options, this menu item is defined for each channel.

2.6.1
2.6.1.1
2.6.1

INPUT menu item seven is the Stereo Link mode option. 

2.7

The choices under this menu are Stereo Link or MS Stereo Link.  (Note that stereo linking channels 1/2, 3/4, etc can also be accomplished by simultaneously pressing the track key/channel select buttons on the front face of the unit, while unlinking stereo channels can be done by repeating.  Only consecutive channels can be linked…in other words, channels 1 and 3 cannot be linked together.)

2.7.1
2.7.1.1

The final option on the stereo linking option screen is to select ALL.  This enables you to link all eight of the channels with a single menu selection.  This is a time saving option preventing the user for having to go through the menu to define the option for all channel pairs or doing it manually.

2.7.1
2.7.1.2


The eighth and final option in the INPUT menu is PFL Mode.  The purpose of this screen is to set the monitored sound to be either pre-fader listening (PFL) or post-fader solo (SOLO).  PFL monitors the pre-fader sound and SOLO monitors the post-fader sound.

2.8

As for most of the other options, this option is channel selectable to individual channels.

2.8.1

The choices for each channel are PFL or SOLO. 

2.8.1.1


OK, so that’s all of the options under INPUT on the main menu.  The third choice on the main menu is OUTPUT.


OUTPUT

The purpose of the output menu is to define to which of the various outputs the Zoom F8 sends the input signals.  There are three basic output choices which are all located on the right side of the unit; headphones, main, and sub.  The headphone jack is a ¼ inch TRS jack.  The main output is a pair of stereo mini-XLR outputs on the right side of the unit and the sub output is the 1/8 inch mini-jack on the right side. 

3.0

The first item in the OUTPUT menu is the headphone selector.  This function defines the signal routing to the headphones.

3.1

When selecting the headphone option on the OUTPUT menu, there are two options on the next screen; ‘headphone routing’ and ‘alert tone level’.  The first item defines what input signal is being monitored on the headphones and the second item defines the volume of the alert ‘beeps’ heard in the headphones, such as when the batteries are low.

3.1.1

The headphone routing menu allows you to toggle through each input and each output to select which is being sent to the each side of the headphones.  In the specific example of this photo, the headphones are set to monitor the summed L/R outputs.

3.1.1.1

The selector for the alert tone level simply allows the user to toggle a higher or lower ‘beep’ volume.

3.1.1
3.1.1.2

The second option under the OUTPUT menu is the Output On/Off section.  This allows the user to turn the main or sub outputs on or turn them off.  Keeping them off saves power.

3.2
3.2.1

As previously described, this menu has an ALL option that enables for bulk changing of the outputs. 

3.2.1

The third option under the OUTPUT menu is the Output Level. 

3.3

The options under the Output Level option are to set the Main, Sub or All outputs to either -10dBV or -40dBV).

3.3.1
3.3.1.1

The purpose of the output delay selection is to correct timing differences for audio inputs to other devices receiving signals from the outputs of the F8.

3.4

The amount of delay can be defined in number of frames for each of the output channels individually, or in bulk for all of the output channels simultaneously using ALL.  (Note that if the sampling rate is set to 196kHz, this function cannot be enabled.)

3.4.1


Each of the output pairs can have the limiter set to act as overload protection for devices connected to the output jacks. 

3.5

The limiter is defined for each output in pairs or an ALL function is again provided to engage and select the output limiter for all outputs simultaneously. 

3.5.1
3.5.1.1

The sixth and final items on the OUTPUT screen are the MAIN OUT and SUB OUT routing selectors.  These screens are used to define whether you will send the signals prefader or postfader to the main outputs.  Tracks 1 through 8 can be either prefader or postfader.  The L/R tracks can only be set to post fader.  Tracks 1-8 and L/R cannot be set at the same time.  Setting one type will deselect the other.

3.6
3.6.1
3.7
3.7.1


RECORD

The fourth of the main menu selection items is the RECORD selection.  The main purpose of this menu item is to define the format of the files that will be recorded.

4.0

The sub-menu under the RECORD selection enables the user to determine which tracks will be written to each of the SD cards, the WAV sample rate, MP3 sample rate, whether or not dual recording is desired, enabling pre-recording, defining the maximum file size, and defining metadata associated with takes. 

The first screen allows the user to define the file format to be written to the SD cards.
   
4.1
4.1.1

Submenu 4.2 is the same as 4.1, except it applies to the second SD card, while submenus 4.3 through 4.5 are simply selection menu’s for sample rate and bit depth.

The sixth selection under the RECORD menu allows the user to turn on the dual record function for channels 1 through 4.  When dual record is turned on for channel 1, the duplicate channel is recorded to channel 5.  Channel 2 is duplicated on Channel 6 and so forth.  The levels of the duplicate channel may be set at a lower value than the initial channel to allow for some additional recording headroom in case of peaking.  However, the levels of either of the dual channels remain independently set by the level knobs for each respective channel.

4.6
4.6.1
4.6.1.1

The seventh option under RECORD is for pre-record on-off.  The F8 pre-record duration is fixed at 6 seconds at sample rates up to 88.2kHz and decreases at higher sample rates.  There is no option to change the pre-record duration to a different value. 

4.7
4.7.1

The maximum file size is defined by the next menu item.  Most are familiar with this menu and typical file sizes up to 2gb are provided in the size menu.

4.8
4.8.1

The ninth item in the RECORD menu is the ‘next take’ selection.  This item is for providing customized input for metadata notes the user might want to associate with specific recording files or takes.  Tapers won’t be using this menu much, so I’ll leave the photo’s to self-explain what this is about.

4.9
4.9.1
4.9.1.1


PLAY

Proceeding to the next main menu selection, the purpose of the PLAY is to define the parameters for playing back files on the Zoom F8.

5.0

There are four play modes that can be selected under the PLAY item, as shown in the following photo.

5.1
5.1.1 


TIMECODE

The purpose of the sixth main menu item, TIMECODE, is to define timecode parameters.  As mentioned already, tapers don’t typically use the timecode function so my familiarity with all of the options under this are limited.  I’ll provide a few pictures to show folks the various pages.  Hopefully, the functions performed at each menu page will be self-explanatory.  Refer to Section 8.0 for a slightly more detailed explanation of the timecode options.

6.0
6.1 
6.1.1


SLATE

The feature set on the Zoom F8 includes an internal slate microphone.  The SLATE item on the main menu enables the user to define parameters associated with the slate mic, such as the routing and the tone of the slate mic.  Section 1.0 contains details on how to operate the slate tone and mic.

7.0 
7.1 

Under the slate mic selector, the user sets the slate mic level, routing of the mic, and whether to turn the mic on or off.  The slate mic can be used by the user to add verbal que’s or comments to the recording.

7.1.1 
7.1.2.1

A slate tone is also available.  The slate tone menu allows the user to define specific parameters related to the slate. 

7.2
7.2.1
 7.2.1.3 


SYSTEM

The SYSTEM menu is a general menu where items that don’t fit in any of the other menu’s are placed. 

8.0 

The first selection under the system menu is for setting the date and time.

8.1

The user first defines the date format preference.

8.1.1

 
Then the user sets the date and time.

8.1.2 


The second selection under the SYSTEM menu is for defining specifics related to the three power sources, such as the voltage setting for the external battery connectors and the types of batteries being used in the battery tray.

8.2

The following picture shows the next screen.  When any of the three power sources are active, the rectangular shape that looks like a AA battery will turn green and indicate the voltage reading of that power source.  In this photo, the unit is being powered from the AA battery sled and the voltage from the sled is 9.8V.  Note that this same information is also shown in the upper right corner of the screen (and remains present on I believe all of the input screens as well as the monitoring screens).  When the voltage decreases to a pre-defined voltage, the indicator will change from green to orange to red as the voltage decreases closer to the shutdown voltage.  Since the voltage is fixed for the ‘DC In’ (jack on the rear) and ‘Int AA’ (battery sled) selections, the voltage setpoints for those two settings cannot be modified.  However, since the voltage from the Hirose connector can vary between 9V and 16V, this screen allows the user to define the shutdown and nominal voltages for the battery that will be used from the Ext DC connector.  (NOTE:  When more than one power source is present, if the voltage from the source supplying power to the unit decreases to one of the low voltage setpoints, the F8 will automatically switch to a ‘healthy’ power source.)

8.2.1

When AA batteries are installed in the battery tray/sled, the user should define the type of batteries being used in the power source menu. 

8.2.1.2


The third menu item is to enable the automatic powering off of the unit.  If the unit is left, it will power off automatically.  (NOTE that the auto power off is currently defaulted to ten hours without any option for change…which renders this function basically useless.  At first I thought the manual was in error and that this was likely a ten minute auto off, but I left the unit idle for 45 minutes and it didn’t power down automatically, so apparently ten hours is right.)

8.3
8.3.1

The home timecode display size choices are ‘big’ and ‘small’.  When ‘small’ is selected, the timecode time is the smaller of the two times displayed on the monitoring screens (see Section 1 for the monitoring screens), while the recording time is the larger of the displayed times.  When ‘big’ is selected, the timecode time is the larger of the two. 

8.4
8.4.1

The user may define various parameters related to the level meter in the fifth menu item under SYSTEM.
 
8.5

Parameters available for definition are type, peak hold time, resolution, and level meter view. 

8.5.1

Meter type options are Peak, Peak + VU, or VU Only. 

8.5.1.1 

Peak hold time can be defined.

8.5.2 
8.5.2.1

Resolution determines whether the level meter is segmented (very similar to the lights on a SD-7xx) or a continuously solid bar. 

8.5.3
8.5.3.1

The level meter view option allows the user to define the information that is displayed in each of the monitoring screen views.  The following sequence of photos should be self-explanatory for making this selection.

8.5.4


The LED brightness selector, varying between 0 and 100, allows the user to increase and decrease the intensity of all of the LED lights on the F8. 

8.6 

The LCD option allows the user to define parameters related to the display, such as setting the intensity of the LCD, selecting a display power saving mode, and choosing the outdoor mode (for a monochrome display). 

8.7


The Play-Key Option defines what happens when the user presses the play button during either recording or playing.  The options during both recording and playing are Pause Only, Pause and Mark, or Mark Only.

8.8


The ninth option under the SYSTEM menu allows the user to perform a factory reset.
 
8.9


The final SYSTEM option displays the firmware version. 

8.10


SD CARD

The next to item on the main menu is the SD CARD menu.  The basic purpose of this is managing the SD card media that’s installed in the Zoom F8. 

9.0 

The three functions that can be performed under the SD CARD menu are to check the card information, do a card performance test, and format the card.

9.1

The following shows the information displayed for the card under the first selection from the above menu.

9.1.1

To conduct a card performance test, the user must first select from the two SD cards and then choose between a quick and full test.  The basic result from the performance test are ‘OK’ for a card that can be used in the F8 and ‘NG’ for a card that does not pass the performance test.  I’m not sure the difference between a quick and full test; however, since the full test takes a significant amount of time (about 45 minutes per 16gb card) I’m not sure anyone would use the full test function.  To date, I haven’t had any problem with cards not working if they passed the quick test. 

9.2


Formatting the card requires simply selecting the card slot and then confirming the format.

9.3


USB

The final main menu selection is ‘USB’.  The act of connecting a USB cable to the F8 alone does not cause the computer to recognize that the unit is connected for reading the cards in the F8.  The first menu item in the USB menu serves this purpose.

10.0
10.1


The Zoom F8 has a handy function that enables it to be used as an audio interface via the USB cable when connected to a computer or ipad.  I haven’t used any of those functions yet, but I’ll include the screenshots from the main screens to give an idea of the types of controls and functions available to the user from this section of the menu.

10.2


« Last Edit: November 05, 2015, 07:31:24 PM by tonedeaf »

stevetoney

  • Guest
  • Trade Count: (0)
Re: Review - Zoom F8
« Reply #6 on: November 01, 2015, 08:27:40 PM »
6.0   WIRELESS – BLUETOOTH

The general operation of the Bluetooth app was described in Section 1.  I won’t repeat that entire discussion, other than to summarize below:

-   Activate Bluetooth by long-pressing the MENU button prior to starting to record.
-   Wireless is currently only available as an IOS device app.
-   Great for monitoring while recording and performing basic control operations, such as STOP, REC, PLAY
-   App is reliable and doesn’t disconnect completely from the F8, other than through minimizing the device app (which is quickly restored when the app is restored on the device).
-   Difficult to accurately set levels on the small screen of an iphone 5s.
-   Approximate unimpeded range of 40 to 50 feet, or about 15 feet in a crowd.
-   Be careful to minimize the app before putting device away to prevent accidental screen touches.
-   Almost imperceptible latency between F8 and the app.


LOADING SOFTWARE FOR BLUETOOTH OPERATION

To load the app onto your device, go to the app store and locate and install the free Zoom F8 app.  It’s called ‘F8 Control’.


After installing the app, visit the Zoom company website and under the F8 product page click on the ‘Downloads’ tab.  Under the software list, you’ll find a ‘Software Extension File’ for Bluetooth Add-on.  Click to download and the following pop-up appears.


Copy the file from the Zoom website to the root directory of an SD card.


Remove any SD card media that might be installed into SD Card Slot 2.  Load the SD card with the needed file into SD Card Slot 1 and turn power on while pressing and holding MENU button until the unit starts and the install screen opens.  Select ‘yes’ to confirm installation. (This is the same process for updating firmware, only except for pressing and holding the MENU button during power up for Bluetooth file installation/update, the user must press and hold the PLAY/PAUSE button during power on for firmware update.)


After installation completes, restart the unit.


PAIRING THE UNIT WITH IOS DEVICE

The F8 and IOS device need to be paired in order to communicate with each other.  To pair the two together, press and hold the MENU button and the following message appears on the F8 display.  Confirm by selecting ‘Yes’.


A password will appear that is used to identify the corresponding Bluetooth device.


Launch the F8 Control app on the IOS device and input the password.  (Note that entering the password is not necessary after the first time the password is entered.)


Once the password is successfully entered, the IOS device will be paired with the F8.


REMOTE OPERATION WITH AN IOS DEVICE

While the F8 and IOS device are paired, some of the functions that are normally available from the front panel of the F8 are disabled. 


The following shows the main screen of the IOS device app.


All of the same information displayed in the main monitoring screen is also displayed on the app.


The mixer is available by pressing the MIXER button on the main screen of the app.


When pressing the MENU button on the main screen, the menu items displayed in the following photo are available.  The functions performed by each item have already been discussed elsewhere in this review.


APP LIMITATIONS/ISSUES

There are two issues that I consider to be significant design issues to the app. 

The first is that the design of the app screen placed the STOP button on the app screen immediately adjacent to the button that toggles the user from the main screen to the mixer screen.  It’s far too easy to accidentally hit STOP during a recording with the mixer button so closely positioned.  So, for example, if the user wishes to change the headphone mix during a performance, they might pull up the mixer control screen on the app, but in doing so they risk stopping the recording via the app with the slightest ‘fat finger’.

The second issue was already mentioned in Section 1 that, short of minimizing the app, there is no function that allows the user to make the app immune to accidental screen touches while keeping the app active.  If the user wants to continuously monitor while recording, an extreme level of care is needed not to touch the screen in the wrong spot. 

I’ve discovered a minor glitch in the app.  When the user opens the app and starts recording, the file shown on the app screen is correct.  However, when the app is minimized and then reconnects, the displayed file is the previously saved file.  There were a couple of other glitches in the initial version of the app, but Zoom has already issued an update which corrected those.  They’ve also already issued updated firmware.  Kudo’s to Zoom for making and issuing quick fixes.


« Last Edit: November 05, 2015, 07:32:26 PM by tonedeaf »

stevetoney

  • Guest
  • Trade Count: (0)
Re: Review - Zoom F8
« Reply #7 on: November 01, 2015, 08:28:40 PM »
7.0   USING THE MIXER

As a taper that has never used a recorder with more than four channels, the most foreign thing to me about the Zoom F8 is the on-board mixer.  However, I quickly learned that, with eight channels, the mixer is an important and essential function.  In my short time using the F8, I think that the most basic way to understand mixer operation is to become familiar with the routing diagram shown in the manual and repeated below. 


While the user doesn’t need to memorize the diagram, the two most important takeaways are 1) the concepts of pre-fader and post-fader operation, and 2) inputs are written/saved to the SD cards pre-fader and output signals are sent to the headphone, MAIN or SUB outputs either pre-fader or post-fader. 

As shown in the diagram, all eight of the inputs have the capability to have dual channel record, trim, HPF, limiter (input), phase invert, M/S, delay, or the slate tone/mic applied to the signal for recording to the SD card.  However, notice from the diagram that the fader has no impact on the eight track inputs being written to the SD card media. 

Each of the eight signals can be routed to the summed L/R channels and mixed so that the mixed L/R channels are recorded onto the SD card media.   Mixing involves first adjusting the parameter settings for each input channel (fader level and left/right panning), then determining how the input signals will be routed to outputs.

The bottom right of the diagram shows the three potential sets of outputs...headphones, MAIN and SUB.  Notice that the routing to the outputs can be either pre or post-fader.  So the mixer can be used to adjust the mix on the outputs.  What that means is that futzing with the mixer during recording doesn't affect what's being recorded onto Channels 1 through 8.  It only affects what's being sent to the outputs.  Also notice that there is a second output limiter post-fader.  This limiter is to protect from overloading the outputs post-fader, since the fader can add additional gain to the inputs to cause overload on the signal sent to the outputs. 

So a couple of examples…let’s say you’re mic’ing a band’s live performance and you’ve got mic’s on stage isolating on the bass amp, drums, guitar amp, etc.  You can use the mixer to play around with the mix on the outputs by adjusting the individual channel sliders to achieve a good balance of sound on the outputs.  You can also adjust the panning to simulate how the instruments are positioned on-stage.  Once setup, the user can send all of the mixed signals post-fader to the L/R channels and record the mix on the fly while still recording the raw input data on all eight input channels.  After the show is over, if you like sound of the on-the-fly L/R mix you’re done.  If you don’t like the L/R mix, you’ve got all of the raw inputs to work with in post to produce a better mix with your DAW. 

Or let’s say you’re doing an audience recording and the only active output is the headphones which you’re using for monitoring.  You’ve got four microphones on a stand…perhaps omni’s and cardioids.  The music starts and you get all four channels balanced so they’re peaking around -6dBFS, but on first listen through your headphone outputs you think you might hear some noise but the ambient music is loud and you’re not sure.  The headphone level knob is all the way up and you still can’t hear through the headphones.  In this case, go to the headphone output routing and make sure the headphone is monitoring the L/R outputs post-fader.  Then use the select encoder knob to toggle to the mixer screen.  Move all four level sliders so they’re not outputting any sound, but then one-by-one move each one of the level sliders to towards the maximum position (which I think is +12dBFS) to determine which is the offending channel.  By adding as much as 12db of gain post-fader to the signal, you can hear the sound through the headphones a lot better at a loud show.  The volume at that output on my ATH-M50 headphones is LOUD!

The mixer can also be used in the same manner described when playing back recorded tracks on the F8.  During playback, depress the track keys/channel selector buttons to switch between playing and muting that track.

So in summary, the main takeaway is to remember that inputs are recorded pre-fader, so messing with the mixer doesn't do anything to the recording of the eight inputs during recording.  The mixer only affects the outputs and the data being recorded on the L/R tracks.
« Last Edit: November 05, 2015, 07:33:12 PM by tonedeaf »

stevetoney

  • Guest
  • Trade Count: (0)
Re: Review - Zoom F8
« Reply #8 on: November 01, 2015, 08:29:27 PM »
8.0   TIMECODE

Timecode is time information written to data when recording video and audio.  It’s used for video editing, control of other devices and synchronization of audio and video.

The Zoom F8 generates accurate timecode.  If video and audio data have timecode, synchronizing them together is easy when using video editing software.  Two examples of how timecode is used are provided on page 87 of the manual.  In the first example, the F8 is connected to a video camera via the timecode out connector on the F8.  Audio is recorded with the F8 and, as audio is recorded the video camera is recording video using the timecode data being generated from the F8.  After the session, aligning audio to video on the timecode timeline is simple.  In the second example, an external timecode generator is connected to the inputs of both the F8 and the video camera.  Similar to the first example, the timecode data is recorded with audio on the F8 and the video on the video camera.  Synching the timecodes with video editing software then becomes a simplified process.


The F8 has a timecode mode setting that allows the user to specify whether the F8 generates timecode or receives external timecode, and whether or not timecode continues running when the F8 is not being used to record.  For example, the F8 can be used to output timecode from the timecode output jack even when recording is stopped.


The F8 also enables the user to set user bits for internal timecode.  User bits are data that can be set to be included in the timecode.  Recording date information, for example, can be useful when editing later.

When timecode is input through the timecode in jack, the user is provided with a ‘jamming’ function which sets the internal timecode on the F8 using the timecode input from the external source.  The user may also restart the timecode from a specifically defined restart point.  When the restart option is selected, the user is prompted for a restart time.


The user has the capability to set the frame rate for internally generated timecode to all of the standard timecode framerates used by domestic and international video standards, such as for the NTSC and PAL video formats. 

The first mode of operation is ‘off’.  No timecode will be written to the recording file and timecode will not be output from the timecode out jack.  In cases where there’s no need for timecode, this should be the selection for power conservation.


There are three modes of operation where the F8 is generating internal timecode; Int Free Run, Int Record Run, and Int RTC Run.  Int Free Run mode generates timecode regardless of the recording mode.  Int Record Run generates timecode when recording.  Int RTC run generates timecode regardless of the recording mode.  The difference between Int Free Run and Int RTC Run is that with the first the internal timecode can be set manually, but with the second the internal timecode will be synchronized with the RTC clock.

Finally, there are two modes of operation where the F8 chases external timecode; Ext and Ext Auto Rec.  In both of these modes, the internal timecode will chase the external timecode and you can also enable the automatic generation of internal timecode when there is no external timecode.  However, on Ext Auto Rec, recording starts automatically when external timecode input is detected.  Recording also stops automatically when external timecode stops.
« Last Edit: November 05, 2015, 07:34:10 PM by tonedeaf »

stevetoney

  • Guest
  • Trade Count: (0)
Re: Review - Zoom F8
« Reply #9 on: November 01, 2015, 08:30:29 PM »
9.0   MISCELLANEOUS ITEMS

UPDATING FIRMWARE

To update the firmware on the F8, use the following process.

Visit the Zoom company website and under the F8 product page click on the ‘Downloads’ tab.  Under the software list, find a link to the latest firmware.  Click to download and the following pop-up appears.


Copy the file from the Zoom website to the root directory of an SD card.


Remove any SD card media that might be installed into SD Card Slot 2.  Load the SD card with the needed file into SD Card Slot 1 and turn power on while pressing and holding PLAY/PAUSE button until the unit starts and the install screen opens.  Select ‘yes’ to confirm installation. (This is the same process for updating Bluetooth software, except that when installing the Bluetooth software the user presses and hold the MENU button during power on.)


After installation completes, restart the unit.


FILE STRUCTURE

Takes are discussed throughout the manual, I suppose for consistency with the language used by those in the film industry.  Don’t be confused by this.  A take is simply a new file.  So, for example, I have selected the file naming format option where my files are named based on the date the file is created.  The first file/take created and saved on a certain date is named T001.  So on New Years Eve, the first file would have the name 151231-T001, the second file would be named 151231-T002, etc. 

Files can be saved as mono/stereo or poly files.  A poly file is a single file that contains audio for multiple tracks.  When mono/stereo format is selected, a single mono file is created for each mono track and a single stereo track is created for each stereo track. 

In the mono/stereo mode, all of the tracks will be saved as a single mono files unless you've linked stereo pairs by depressing the track key/channel select buttons for pairs of tracks 1/2, 3/4, 5/6 or 7/8.  The pairs will be saved as stereo tracks if the stereo link mode menu selection is set to stereo link.  They'll be saved as mid-side tracks if the stereo link mode menu selection is set to mid-side.

When selecting poly, the unit will create a single file with however many tracks you have active, up to a total of ten.  The larger the number of tracks, the shorter will be the recorded duration of the file before the unit reaches the file size limit and creates a new file.  For example, two tracks of data recorded at 24/48 yields recorded files approximately 2 hours long to reach the 2gb filesize limit.  A 24/48 poly file of four channels will be one hour long to reach the same limit, while 8 channels will be 30 minutes or so.


STEREO LINKING TWO TRACKS

Link two channels in stereo pairs by pressing a second track key/channel select button while pressing the first.  Linking in this manner enables a track to be written to the SD card as a stereo file in the mono/stereo file mode (see above for explanation).  In addition, when tracks are linked changing one of the PFL settings on one of the tracks changes the same setting on the linked track (phantom, limiter, etc.)  Track 1 can only be linked to track 2.  It cannot be linked to any other tracks.  The other linked pairs are, of course, tracks 3/4, 5/6, and 7/8.

When tracks are linked as stereo pairs, their level controls remain track specific.


DUAL CHANNEL RECORDING

In the REC menu, an option exists for dual channel recording.  This option can be selected for any of channels 1 through 4.  In this option, the same signal is sent to a second channel so that a different level can be set, for example so that if the user is concerned with peaking on one channel, the second channel can be set at a lower level.  The dual channel for channel 1 is channel 5; 2/6, 3/7 and 4/8.

The levels of the dual channels (5, 6, 7, or 8) are independent of the levels of channels 1, 2, 3, or 4.  Even though the same signal is split and sent to a channel pair (1/5, 2/6, 3/7 or 4/8), the level controls on either of the channels in a pair still controls the level of that respective channel.


HOW WARM DOES THE UNIT RUN

As mentioned earlier in the review, I recorded all day at two separate music festivals in which the unit was running continuously all day.  My bag is a Portabrace without much air space.  It was around 90 degrees a couple of days at one of the festivals.  With the unit being powered from the rear 12V jack the unit was warm to the touch, but not hot.  It was not a problem leaving your hand on the unit for an extended time period.  At an indoor show at room temperature, the unit doesn’t get warm at all.


DISPLAY VISIBILITY

There is a capability to switch to a monochrome display for improved visibility in bright daylight.  However, at the outdoor events I’ve attended I didn’t need to use the monochrome display.  The color or normal display was visible without any issues with the LCD brightness set on 60.
« Last Edit: November 05, 2015, 07:35:00 PM by tonedeaf »

stevetoney

  • Guest
  • Trade Count: (0)
Re: Review - Zoom F8
« Reply #10 on: November 01, 2015, 08:31:54 PM »
10.0   SPECIFICATIONS
   
Dual SD card slot supports   16 MB–2 GB SD cards; 4 GB–32 GB SDHC cards; 64 GB–512 GB SDXC cards

Connectors   XLR/TRS combo jacks (XLR: 2 hot, TRS: TIP hot)
Input gain (XLR Inputs; MIC)   +10 – +75 dB
Input impedance (XLR Inputs; MIC)   3.3 kΩ
Maximum input level (XLR Inputs; MIC)   +14 dBu (at 0 dBFS, limiter ON)
Phantom power (XLR Inputs; MIC)   +24/+48V 10 mA maximum for each channel
Input gain (TRS Inputs; Line)   −10 – +55 dB
Input impedance (TRS Inputs; Line)   28 kΩ
Maximum input level (TRS Inputs; Line)   +34 dBu (at 0 dBFS, limiter ON)
Equivalent input noise   −127 dBu or less
Frequency characteristics   10 Hz – 80 kHz +0.5 dB/−1 dB
Crosstalk   −90 dB or less
MIC IN   ZOOM mic capsule input
SLATE MIC   Built-in mic for voice memos can freely be assigned to tracks

OUTPUTS MAIN OUT   
Connectors   TA3 connectors, balanced output (2: hot)
Output impedance   150 Ω or less
Reference output level   −10 dBV (Normal Output Type),
Maximum output level   +10 dBV (Normal Output Type),

OUTPUTS SUB OUT   
Connector   3.5mm stereo mini unbalanced output jack
Output impedance   100 Ω or less
Reference output level   −10 dBV (Normal Output Type),
Maximum output level   +10 dBV (Normal Output Type),

HEADPHONE   
Connector   1/4" unbalanced stereo output jack
Output impedance   15 Ω or less
Maximum output level   100 mW + 100 mW

RECORDING FORMATS WHEN WAV SELECTED   
Supported formats   44.1/47.952/48/48.048/88.2/96/192 kHz,
Maximum simultaneous recording tracks   10 (8 inputs + stereo mix)

RECORDING FORMATS WHEN MP3 SELECTED   
Supported formats   128/192/320 kbps, 44.1/48 kHz, ID3v1 tags
Maximum simultaneous recording tracks   2

RECORDING TIME   
Using a 32GB card   30:51:00 (48 kHz/24-bit stereo WAV)

TIME CODE   
Connector   BNC
Modes   Off, Int Free Run, Int Record Run, Int RTC Run, Ext, Ext Auto Rec (audio clock can be synchronized to timecode)
Frame rates   23.976ND, 24ND, 25ND, 29.97ND, 29.97D, 30ND, 30D
Precision   ±0.2 ppm
Supported input levels   0.2 – 5.0 Vpp
Input impedance   4.6 kΩ
Output level   3.3 Vpp
Output impedance   50 Ω or less

POWER SUPPLIES   
Batteries   8 AA
AC adapter   AD-19 DC12V 2A (center plus)
External DC power supply   HIROSE HR10A-7R-4S 4-pin connector

CONTINUOUS RECORDING TIME (when recording 2 channels at 48kHz/16-bit to SD1 with MAIN/SUB off, Timecode Off, LED/LCD Brightness 5, 32ohm headphones, Phantom Off)

Alkaline batteries       8.5 hours or more
NIMH (2450mAh)   10 hour or more
Lithium batteries   12.5 hours or more

CONTINUOUS RECORDING TIME (when recording 8 channels at 48kHz/24-bit to SD1 with MAIN/SUB off, Timecode Off, LED/LCD Brightness 5, 32ohm headphones, Phantom Off)

Alkaline batteries       4.5 hours or more
NIMH (2450mAh)   6 hours or more
Lithium batteries   8.5 hours or more

CONTINUOUS RECORDING TIME (when recording 8 channels at 192kHz/24-bit to SD1 with MAIN/SUB off, Timecode Off, LED/LCD Brightness 60, 32ohm headphones, Phantom 48V)

Alkaline batteries       1 hour or more
NIMH (2450mAh)   2 hours or more
Lithium batteries   3 hours or more
   
USB Mass Storage Operation   
Class       USB 2.0 High Speed

MULTI TRACK AUDIO INTERFACE OPERATION (driver required for Windows, not required for Mac)
Class        USB 2.0 High Speed
Specifications   44.1/48/96 kHz, 16/24-bit, 8-in/4-out

USB STEREO MIX AUDIO INTERFACE OPERATION (no driver required)   
Class        USB 2.0 Full Speed
Specifications   44.1/48 kHz, 16-bit, 2-in/2-out

EXTERNAL DIMENSIONS   
Main unit   7.0 in. (W) × 5.5 in. (D) × 2.1 in. (H)

WEIGHT   
Main unit only   2.1 pounds (960 g)

« Last Edit: November 05, 2015, 07:38:01 PM by tonedeaf »

stevetoney

  • Guest
  • Trade Count: (0)
Re: Review - Zoom F8
« Reply #11 on: November 01, 2015, 08:32:44 PM »
11.0    SUGGESTIONS AND ISSUES

The following is a list of suggestions and issues that have been identified. 

-   It would be nice if Zoom will make spare battery holders available for purchase so users can have a spare and/or redundant holder.

-   There is no capability, either in the on-board mixer or with the Bluetooth app, to gang multiple channels for uniform level control changes.  Perhaps this function could be added as a firmware enhancement.

-   The battery indicator on both the device display and the IOS app shows white text on light green background.  This color combination makes reading the voltage difficult.  A different font or color combination would make for better readability.

-   In the SD card menu, move the format option to the first/default option since this is a function that is used most often.

-   Hold function should be added.  The level hold is fine, but it can only be invoked before recording is started which somewhat defeats the purpose of having this hold, since most users need level control (especially with eight channels) for level balancing once music performance has started.  Most holds allow the user to vary levels while locking everything else.  This would be a nice addition as an option to the F8 as well.

-   The app should be made available for the Android OS.

-   A screen hold is needed for the IOS app.  It’s too easy to touch something on the app screen to modify recording settings accidentally.  Many or most users will use the app for remote monitoring.  While monitoring, the hold function would be extremely useful to prevent accidental setting changes.

-   On the app, the displayed track during Bluetooth control seems to revert back to the previous track (only the track name being displayed) during recording after the app is minimized on the iphone and then restored again.  (e.g. start recording using the app and the displayed track is Take 3.  Minimize the app and put the phone in your pocket.  A couple minutes later maximize the app and reconnect Bluetooth and now it shows Take 2 even though you’re still recording Take 3.)

-   The mixer button on the main screen of the IOS app is too close to the stop button.  When recording, it’s too easy to accidently ‘fat finger’ and stop recording (DISASTER) when you actually want to use the mixer screen.

-   An option could be provided for the SD cards to be used consecutively.  (e.g. SD2 is not used until SD1 is full and then automatically SD2 starts being used.)

-   Page 20 of the user manual (see Hint box) states that the manual specifies the shutdown voltage that should be set for the external DC power supply; however, this information is not provided in the manual.  Perhaps Zoom could put this information on the website so users know the best setpoints for specific battery voltages.

-   Suggest changing the auto power off duration from 10 hours to something much shorter.  It seems like the point of this function is for power saving, but with a ten hour idle, many batteries will have died before it even reaches the auto power off time.

-   It’s unclear why changing between mic and line level inputs couldn’t have been made a menu selectable option rather than only available by switching between XLR and TRS connectors.
« Last Edit: December 07, 2015, 10:01:21 PM by tonedeaf »

stevetoney

  • Guest
  • Trade Count: (0)
Re: Review - Zoom F8
« Reply #12 on: November 01, 2015, 08:33:30 PM »
(Reserved for future)

stevetoney

  • Guest
  • Trade Count: (0)
Re: Review - Zoom F8
« Reply #13 on: November 01, 2015, 08:33:55 PM »
(Reserved for future)

stevetoney

  • Guest
  • Trade Count: (0)
Re: Review - Zoom F8
« Reply #14 on: November 07, 2015, 04:04:05 PM »
I decided to unlock this since leaving it locked would likely cause it to fall down to the second page and beyond.  I don't necessarily intend to keep bumping this, but since I put so much time in on it, would be nice to keep it up near the top so people can find it easily...at least while the unit is still new to the market.


RSS | Mobile
Page created in 0.078 seconds with 41 queries.
© 2002-2024 Taperssection.com
Powered by SMF